Creating a layer 7 Farm
A layer 7 Farm operates at the Application layer, the highest layer in the OSI model. It is responsible for directing traffic based on the contents of HTTP requests. With this Farm, we can perform tasks such as SSL termination, content caching, HTTP-header rewrites, etc.
Let us demonstrate how to create a Layer 7 Farm and assign it a virtual IP and port. The virtual server will distribute traffic equally to the backend servers through the VIP, 192.168.88.118. For secure HTTPS, use port 443. For unsecured HTTP, use port 80.
VLAN setup
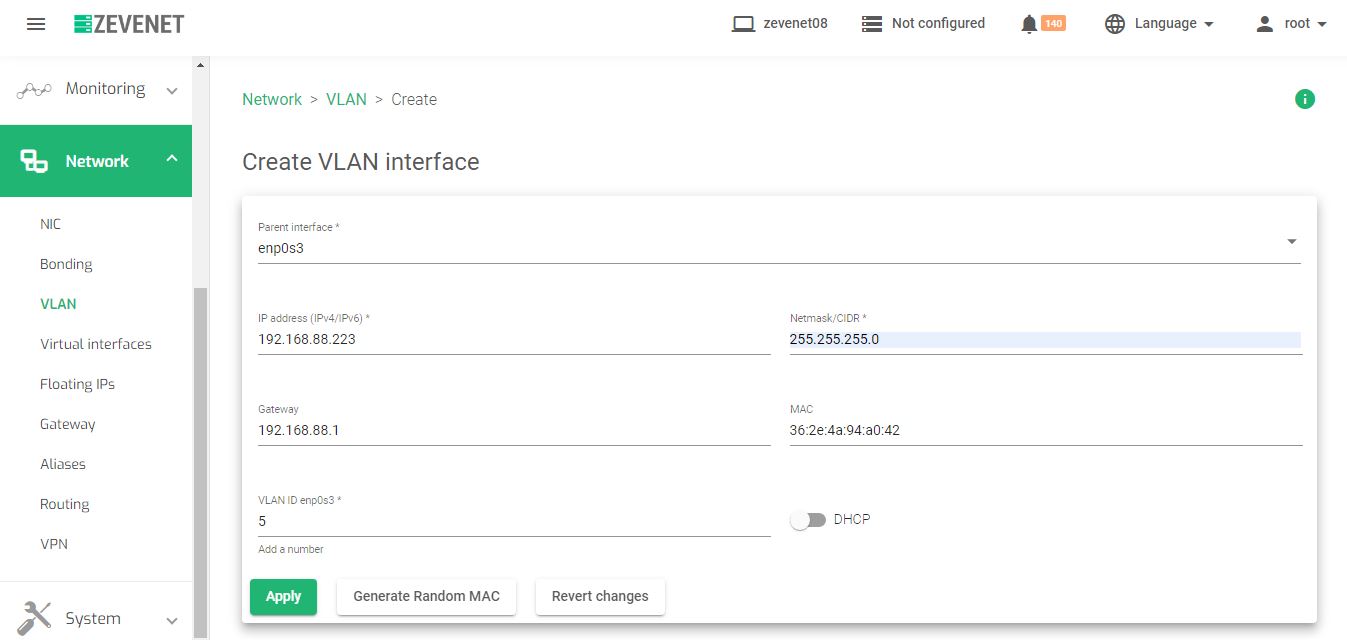
- On the menu, go to Network > VLAN and click the Create VLAN button.
- Select the first Parent Interface. The parent interface is the ethernet interface providing a network connection.
- Set the VLAN ID as a number from a range of 1 to 4094.
- Assign an IP address and Netmask/CIDR* of the VLAN interface in either Ipv4 or Ipv6 format.
- Setting a Gateway is optional. But, If you don’t, a static route will be configured automatically.
- Click the Generate Random Mac to generate a Mac Address
- Save the configurations by clicking the Apply button.
Next: Virtual Interface setup
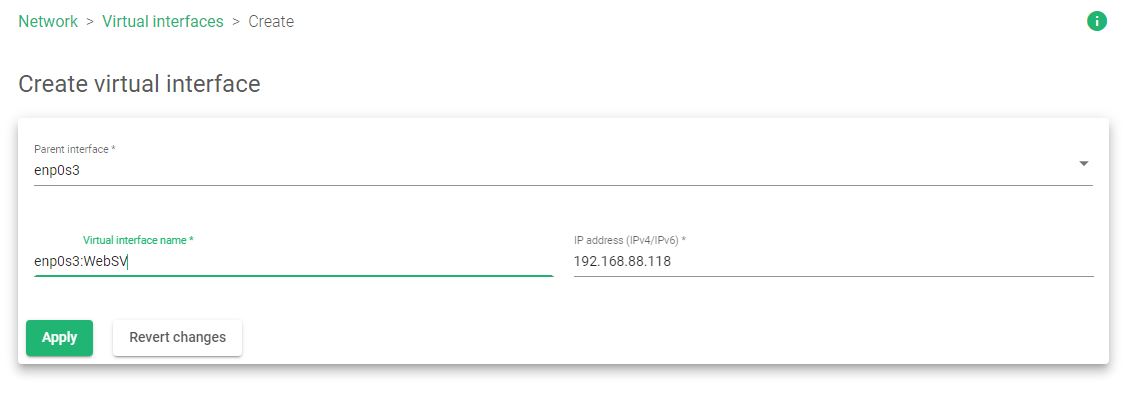
- Go to Network > Virtual Interfaces to create a Virtual IP (VIP)
- Click the Create Virtual Interface button. The form will appear like the one in the image below.
- Select the VLAN interface as the Parent Interface.
- Set the IP address of the virtual interface in either Ipv4 or Ipv6 format.
- Add a suitable Virtual interface name.
- Save the configurations by clicking the Apply button.
Next: Add a Virtual server(LSLB farm)
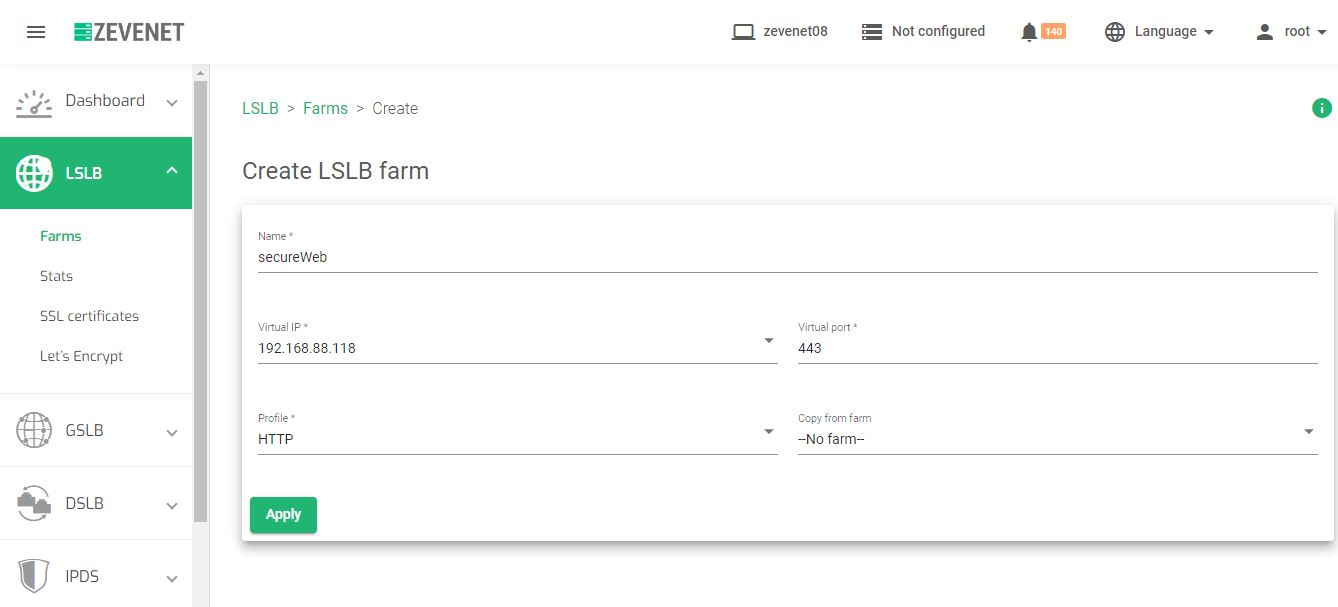
- To create a virtual server , go to LSLB > Farms and click the Create farm button and fill out the form.
- Label the Farm with a suitable Name.
- Choose the farm Profile HTTP.
- Select a Virtual IP that you created in the Virtual interfaces section
- Save the configurations by clicking the Apply button.
Next: Add an HTTP service
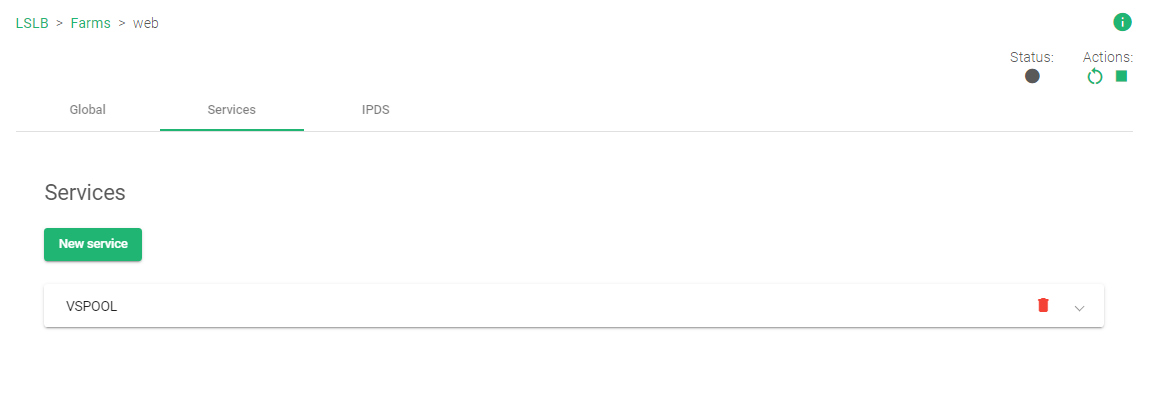
- Click the Services tab. The service section defines a server pool. Click the New Service button and give it a suitable name. For this example, let’s use VSPOOL. You will then be prompted to restart the farm for changes to take effect.
- Open VSPOOL and scroll to farmguardian. Enable the check_http flag. The changes will be saved automatically.
Next: Add Backend servers
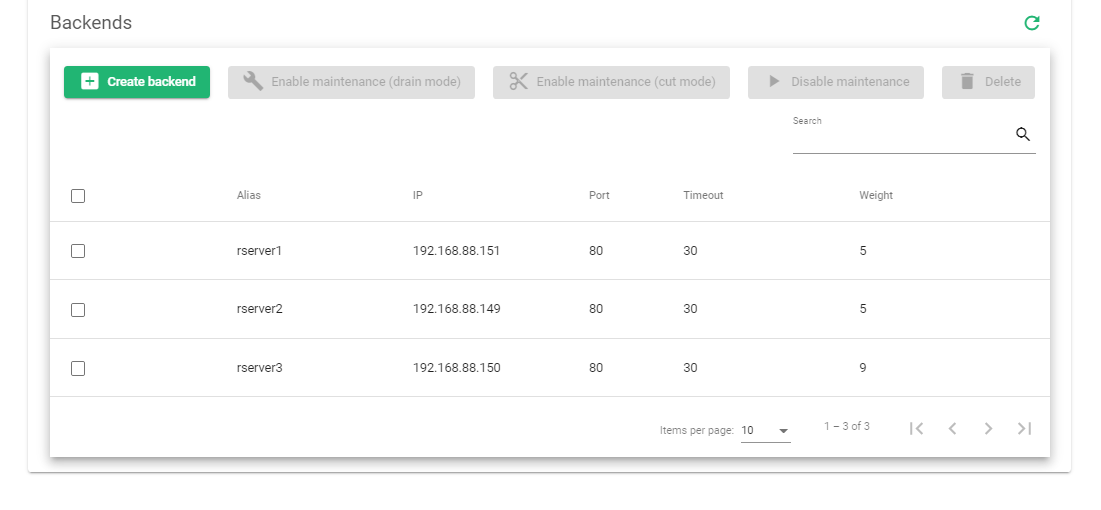
- Within the service VSPOOL, scroll till you reach the Backends section and click the Create backend button.
- Assign an IP address in either Ipv4/Ipv6 format and map it to port 80 or 443.
- Assign a server Timeout in seconds and Weight as a number in a range from 1 to 9.
- Save the configurations by clicking the Apply button.
- Repeat the process from line 21 to add another backend with a different IP and Port.
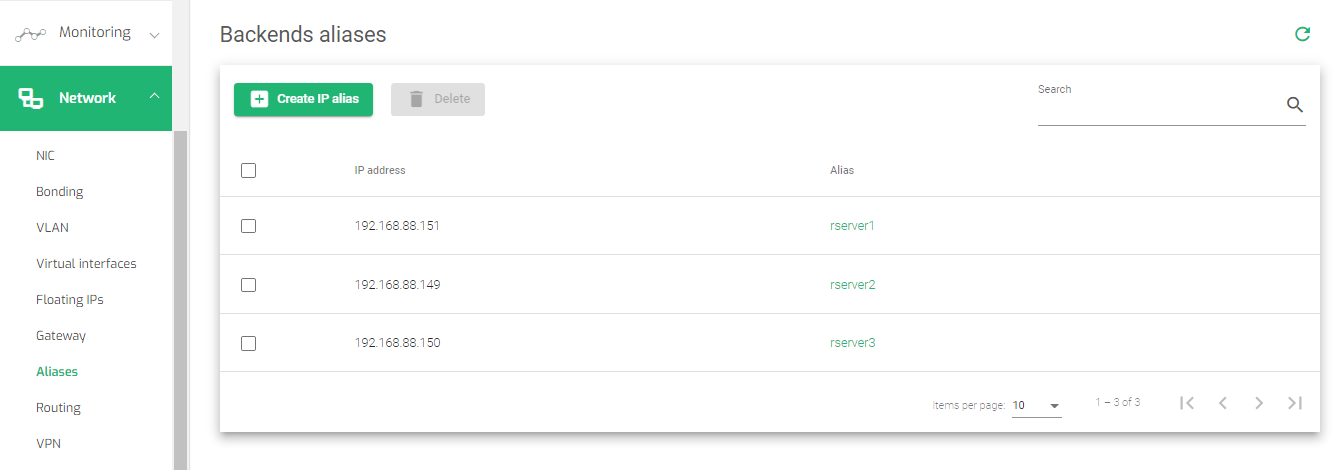
- Add Alias names that easily identify these backend servers through Network > Alias and click the Create IP alias button.
For this example, ZEVENET load balancer will listen for incoming HTTPS traffic through 192.168.88.118:443 and will distribute it equally amongst the backend servers.
Note: The default load balancing method is Weighted Round Robin.
For more details about Layer 7 load balancing, read LSLB | Farms | Update | HTTP Profile.
Creating a layer 4 Farm
Layer 4 load balancing refers to distributing traffic to backend servers based on data from Layer 3(Network) and Layer 4(Transport) protocols. An L4xNAT profile routes traffic based on the source and destination IP address and their associated port numbers in the packet header.
In this section, we will demonstrate load balancing a Session Initiation Protocol (SIP) protocol that accepts TCP/UDP packets through port 5060. The configurations for other L4xNAT protocols follow this similar guide. A Virtual interface on a (VLAN) is an absolute necessity to create an L4xNAT profile.
Create a VLAN
To create a VLAN, read this guide: Network | VLAN | Create.
Create a Virtual Interface
To create a Virtual Interface, read this guide: Network | Virtual Interface | Create.
Create an LSLB Farm
- Go to LSLB > Farms and click the Create farm button.
- Label the Farm with a suitable Name and choose the farm Profile L4xNAT.
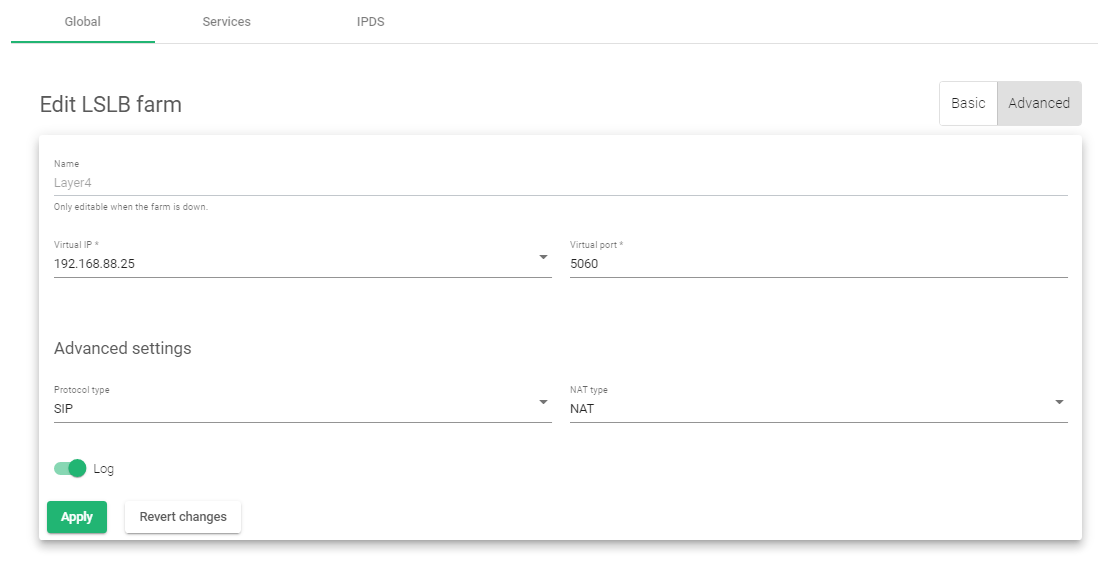
- Use the Virtual IP that you created in the Virtual interfaces section and assign it to port 5060.
- Save the configurations by clicking the Apply button.
- Click the Advanced settings tab and change the Protocol type to SIP.
- Leave NAT type as NAT and Enable Log.
- Save the configurations by clicking the Apply button.
Next: Services settings
- Under the services tab, use this section to change the load balancing scheduler, enable or disable Persistence, and add health checks with farmguardian.
Adding backend servers
- Within the Services section, scroll till the Backends section. Click the Create backend button and select Custom IP within the Alias field.
- Assign the IP address of a backend server in either Ipv4 or Ipv6 format and a port 5060.
- Assign a server Timeout with units as seconds, a Priority value as a number from a range of 1 to 9. Assigning the Weight is optional. If you don’t assign, the default weight will be 1.
- Allocate the Maximum number of connections to a backend in the Max. conn field.
- Save the configurations by clicking the Apply button.
- Repeat the process from line 9 to add another backend server.
- Add Alias names that easily identify these backend servers through Network > Alias and then click the Create IP alias button.

In this example, ZEVENET load balancer will listen to incoming TCP/UDP packets through the IP address 192.168.88.25, port 5060, and it will distribute traffic equally equally between bkserver1 and bkserver2 depending on the load balancing scheduler that you selected.
For more details about Layer 4 load balancing, read LSLB | Farms | Update | L4xNAT Profile.