Contents
- 1 Step 1: Log in to the OpenStack dashboard
- 2 Step 2: Upload a KVM template of the ZEVENET Image
- 3 Step 3: Create an SSH Security Group
- 4 Step 4: Create a Private Network
- 5 Step 5: Add the Private Network to an OpenStack Virtual Router
- 6 Step 6: Launch a Compute Instance of the ZEVENET KVM template
- 7 Step 7: Associate an IP to the External Floating IP
OpenStack as an open-source cloud computing infrastructure software enables users to create and manage resources, networks, and virtual machines. As an OpenStack User, you may deploy virtual machines with various image formats, and these include ISO, PLOOP, QCOW2, VDI VHD, AMI, etc.
In this article, we will provide a step-by-step guide on how to upload the KVM template of ZEVENET EE_v6.2 image in OpenStack, create an SSH security group, create a private network, and add it to a router, and launch a compute instance of your installed ZEVENET KVM template.
Step 1: Log in to the OpenStack dashboard
Start by logging into your OpenStack dashboard using your credentials. Once logged in, you will be presented with a web interface that allows you to manage your OpenStack resources.
In this guide, we assume you are familiar with OpenStack and have access to its web interface or the server terminal hosting your OpenStack Instance. If you do not, follow this installation guide: OpenStack Installation With DevStack.
Step 2: Upload a KVM template of the ZEVENET Image
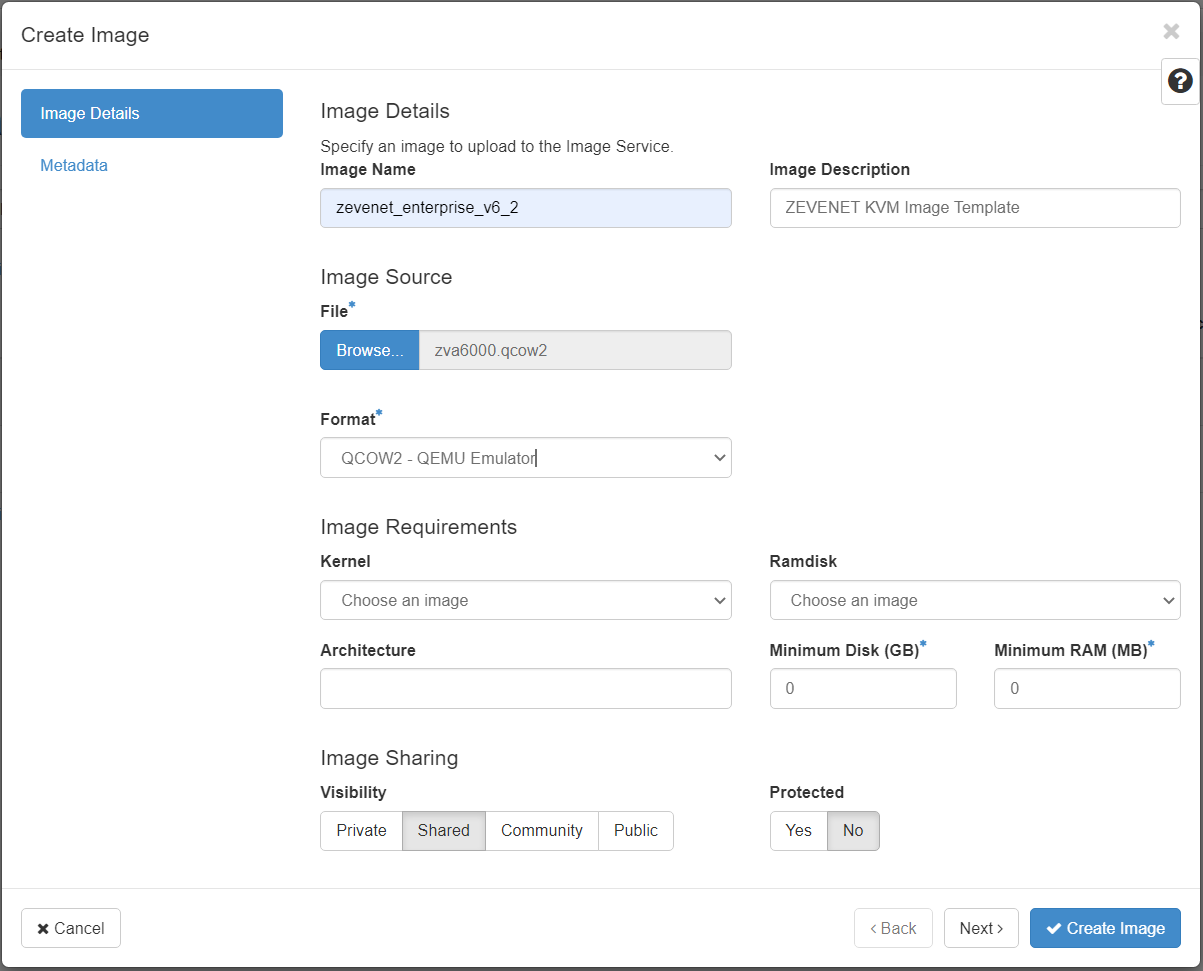
The next step in creating a compute instance in OpenStack is to upload an image that will be used to create the instance. In this case, we will be using zva6000.qcow2 image.
To upload the image, follow these steps:
- Click on the Projects >> Compute >> Images tab on the left side of the Horizon dashboard.
- Click on the Create Image button on the right side of the screen.
- In the Create Image dialog box, enter a name for the image, such as zevenet_enterprise_v6_2
- Enter the description of this image in the Image Description section.
- In the Image Source Section, select the Image you downloaded, in *.qcow2 format.
- In the Format section, select QCOW2 – QEMU EMULATOR as the Image format.
- Click the Create Image button to upload the Image.
Step 3: Create an SSH Security Group
Now that the ZEVENET KVM image template has been uploaded, the next step is to create an SSH security group that will allow access to the compute instance.
To create an ssh security group:
- Click on Project >> Network >> Security Groups on the left side of the dashboard.
- Click on Create Security Group on the top-right of the screen.
- In the dialog box that shows up, enter a Name to identify the security group.
- In the Description field, enter a brief description about the security group
- Click on the Create Security Group button to create the security group.
- Within the security groups list, click on the Manage Rules button on the security group you just created.
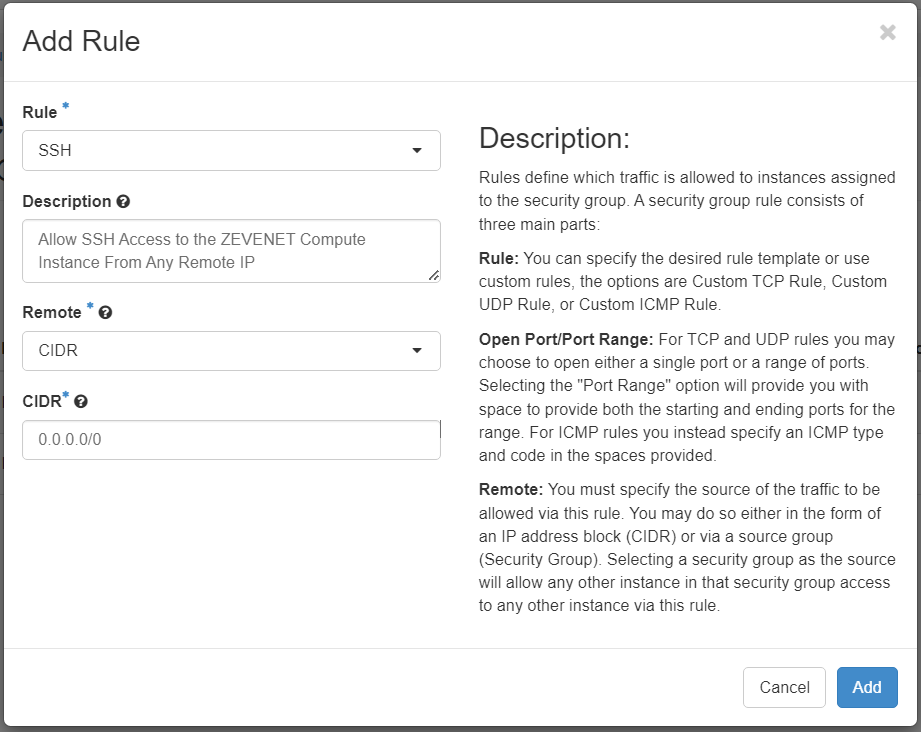
- Click the Add rule button.
- In the Add rule dialog box, select SSH as the Rule.
- In the Description field, Give a brief explanation about what this rule is about
- Click the Add button to create the rule.
Step 4: Create a Private Network
After creating a security group, ensure the resources are protected and placed behind a private network. This network is only accessible by the compute instance and other resources on the same network.
To create a private network:
- Click on Project >> Network >> Networks.
- Click the Create Network button at the top right.
- In the dialog box that shows up, enter a Name that easily identifies this network.
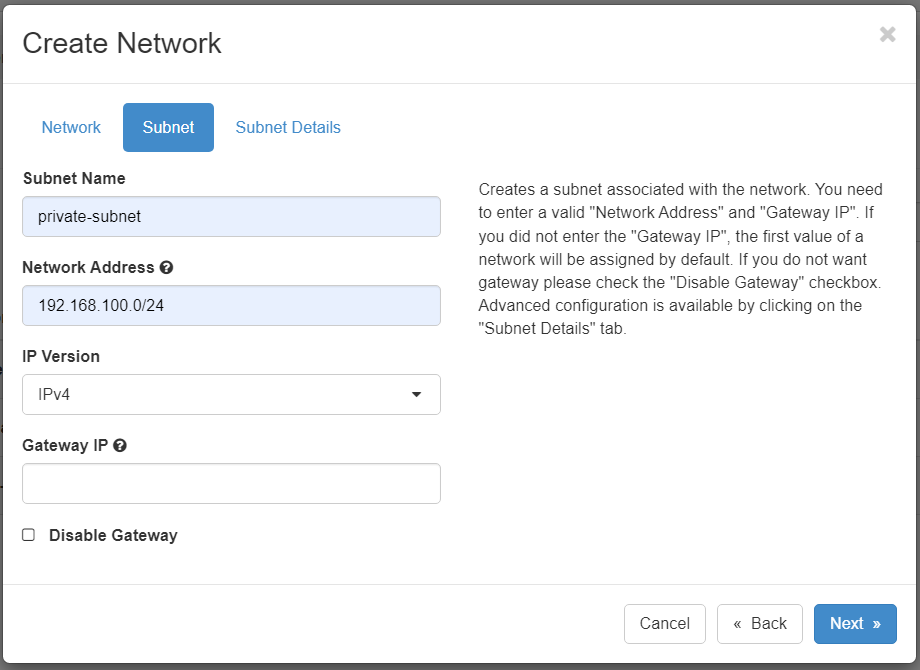
- Click on the Subnet tab.
- Enter a Name to Identify the subnet.
- Enter the Network Address or CIDR in IPv4 format, e.g., 192.168.100.0/24.
- Select the IP version as IPv4.
- Enter the Gateway IP address. Note that If you do not assign a Gateway IP, one will be assigned automatically.
- Within the Subnet Details tab, you may leave the settings to their default.
- Click the Create button.
Step 5: Add the Private Network to an OpenStack Virtual Router
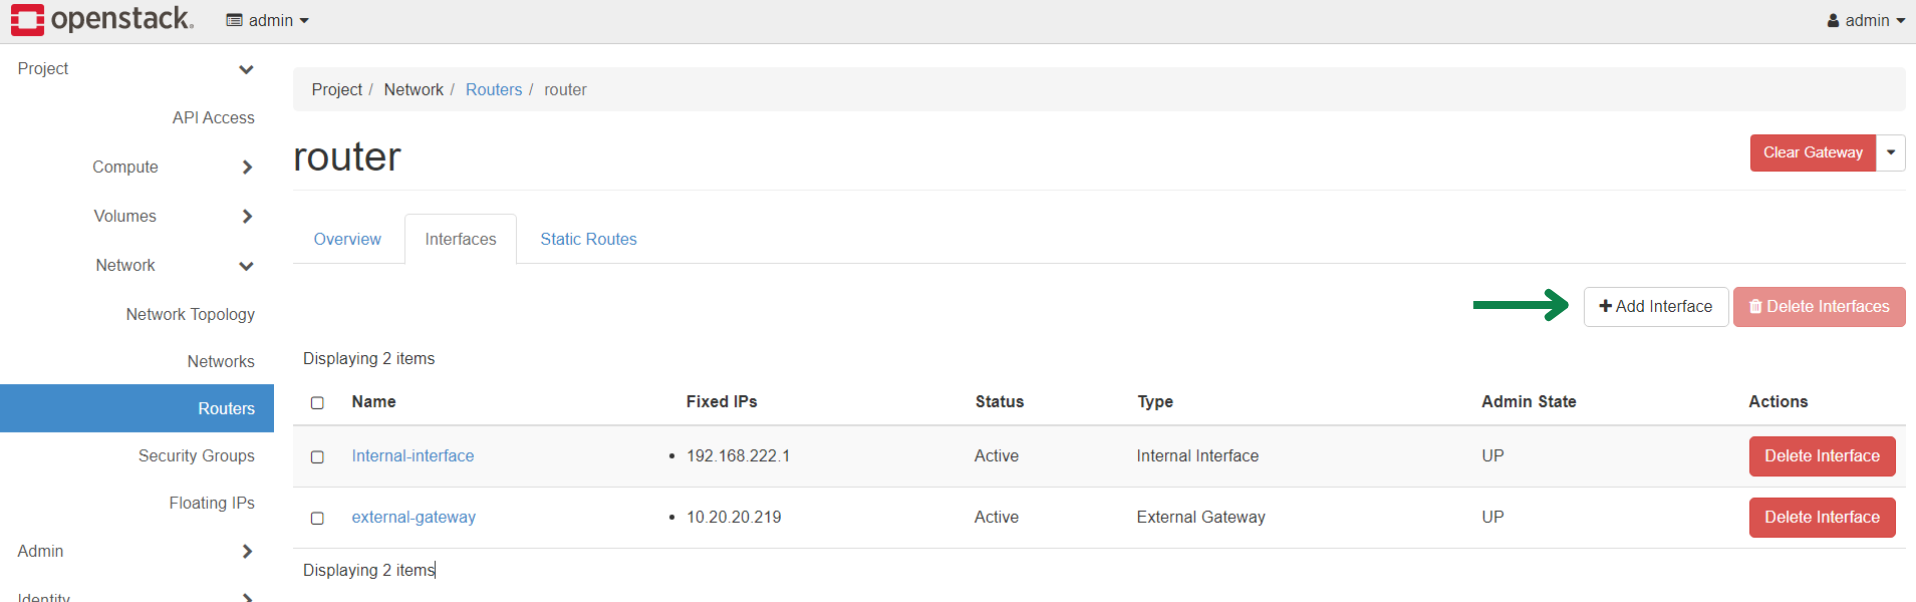
The private network you created must communicate with other private computing resources or be accessible from external networks. We need a virtual router to bridge this connection. By default, OpenStack provides a router with a connection to the external network. We must add an interface for the internal network.
To add the private network to the router:
- Click Project >> Network >> Routers.
- Click on the listed Name of the router with an external network interface.
- Click on the Interface tab.
- Click the Add Interface button.
- In the Subnet field of the form that shows up, select the private subnet you created previously.
- Click the Submit button.
Step 6: Launch a Compute Instance of the ZEVENET KVM template
After successfully following the previous steps, we must launch the instance in the private cloud so we can access it via an external network.
- Click on Project >> Compute >> Instances
- Click on the Launch Instance button to create a new Instance.
- In the Details tab, provide a Name and Description to identify the Instance.
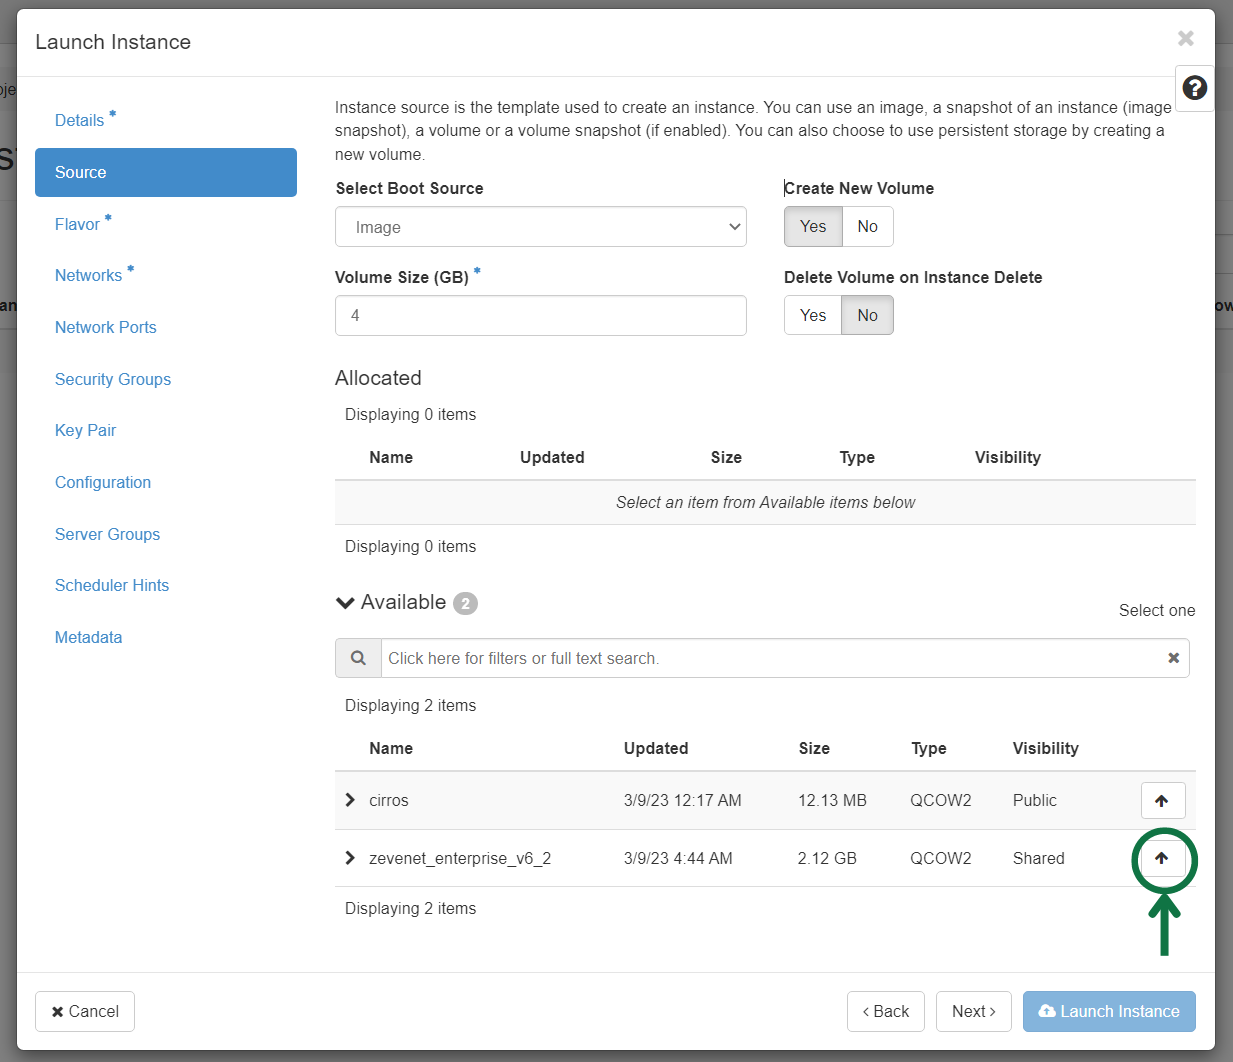
- In the Source tab, select Boot Source as Image.
- Select the ZEVENET Enterprise Image Template by clicking the Upwards Arrow beside it.
- In the Flavor tab, select a volume suitable for your project by clicking the Upward Arrow. m1.xlarge is recommended, or you can create a custom volume for your application.
- In the Network tab, select the private subnet you created by clicking the Upwards arrow beside it.
- In the Security Groups tab, select the Security group you created earlier on.
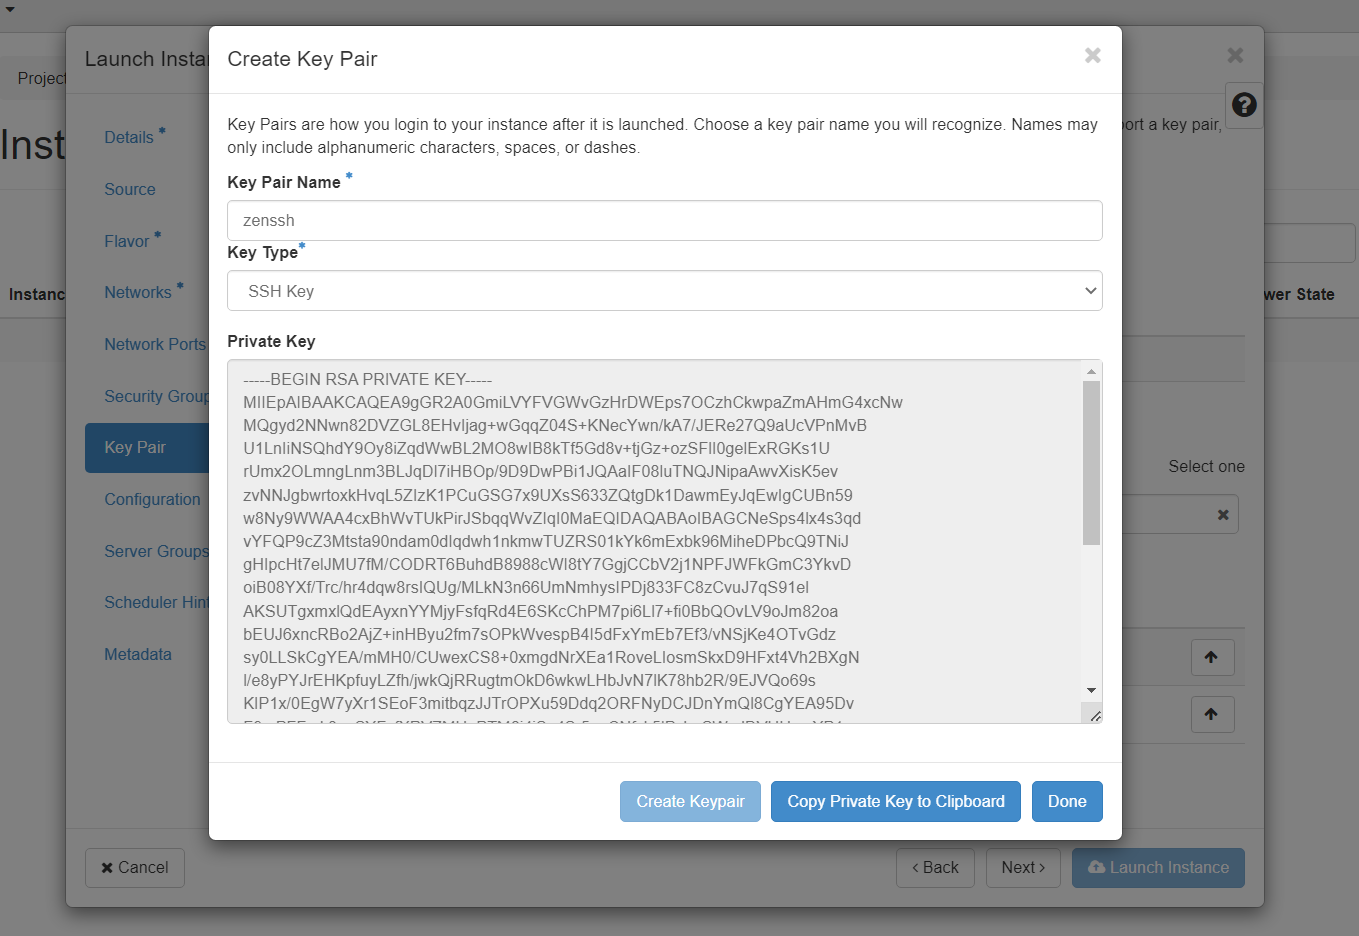
- In the Key Pair tab, Create an SSH key pair by clicking the Create Key Pair button.
- Enter a key Pair Name to Identify it. e.g., zen_ssh.
- Select the Key Type as SSH Key
- Click the Create Keypair button.
- Copy Private Key to Clipboard, Save it as a separate file and click Done. Ensure the private key is never exposed. The one shown in the image above is experimental.
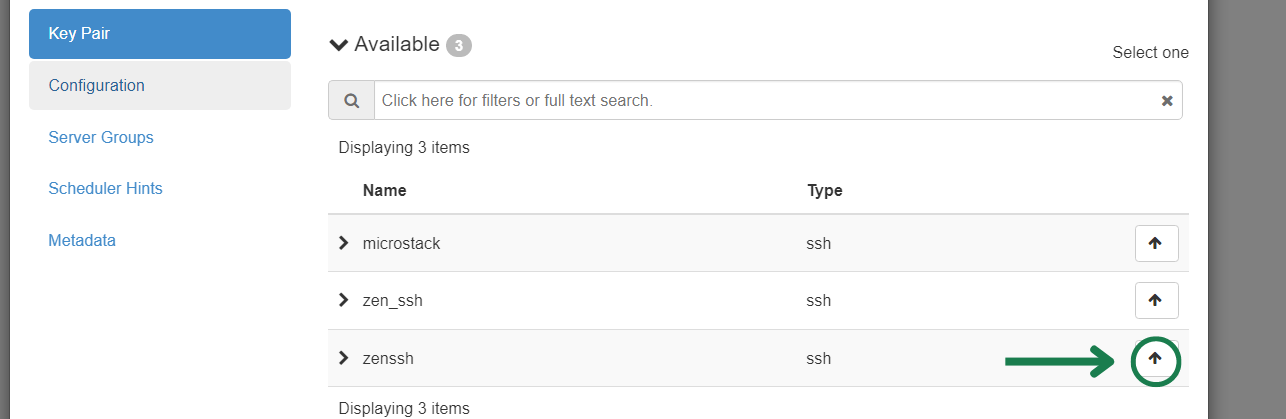
- Select the created Key pair.
- Click the Launch Instance button. The process will take some time. The time Launching will take will depend on your hardware specs and connectivity.
Step 7: Associate an IP to the External Floating IP
To access the private network connected to the virtual router, we must associate the interface we created with the External. That way, we can access the Instance directly via SSH.
To Associate IP to the Floating IP:
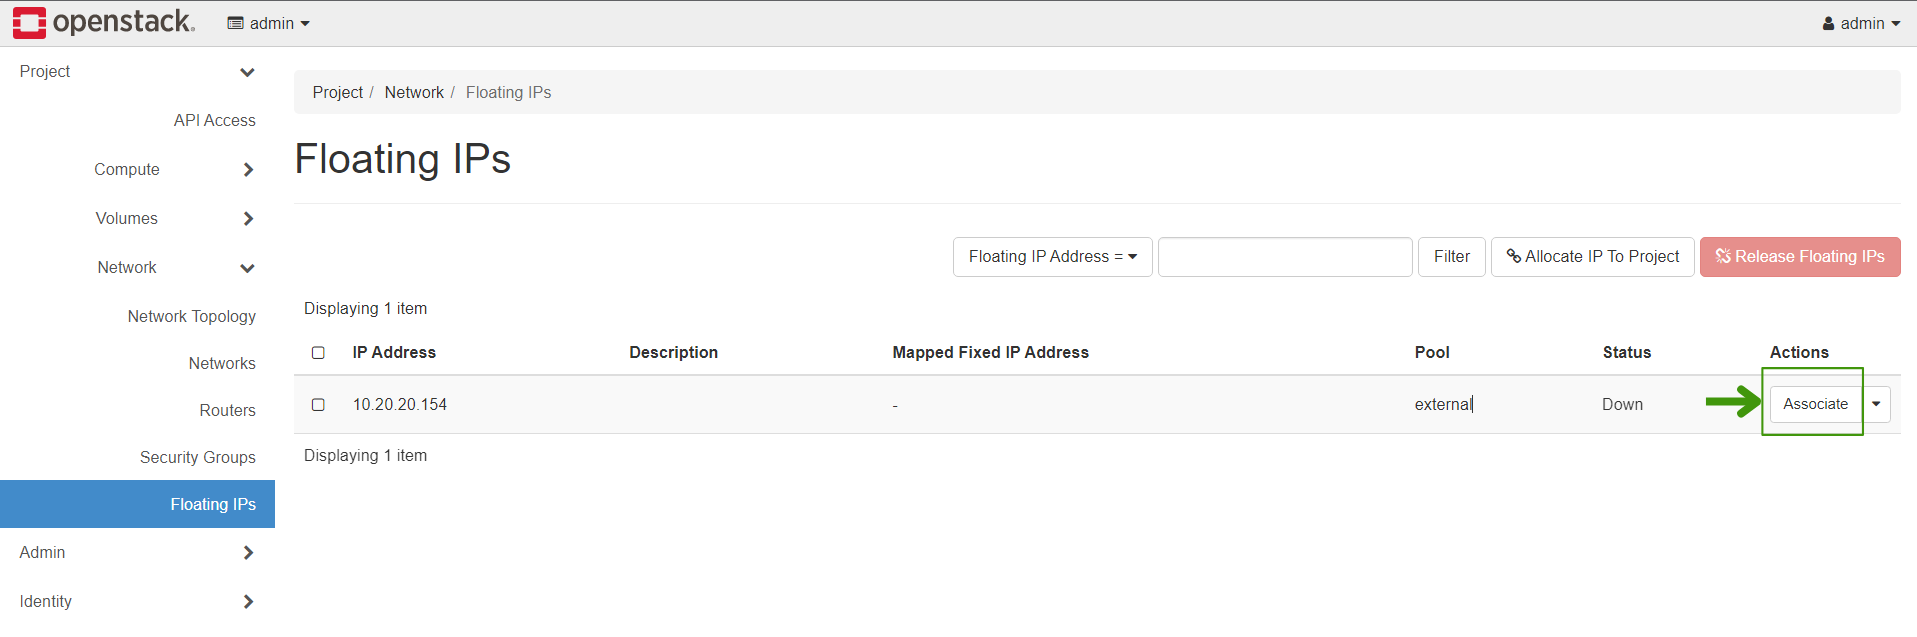
- Click Project >> Network >> Floating IPs
- Click on the Associate button.
- In the Form that appears, select the private network you created earlier as the Port to be associated.
- Click the Associate button.
The ZEVENET instance will be available via SSH from your hardware node or OpenStack hosting servers in the cloud.