Contents
Overview
Brocade ADX is part of Broadcom Inc products and provides load balancing, traffic management, and security for web applications.
Like most technologies, Brocade ADX has some drawbacks and limitations that the ZEVENET TEAM has analyzed and brought forth solutions for. Some of these drawbacks include:
- Complexity: The setup and configuration of Brocade ADX can be complex, especially for users new to networking and load-balancing. This makes it difficult for organizations to get up and running quickly and efficiently.
- Scalability: While Brocade ADX is designed to handle high traffic amounts, scaling the solution to meet increasing demands can be challenging, especially in highly dynamic environments.
We gathered more drawbacks, and ZEVENET Team is working resiliently to use all suggestions to improve ZEVENET ADC. However, some of these limitations may depend on your specific deployment scenario.
Prerequisites
To migrate from Broadcom’s Traffic Manager to ZEVENET, ensure you accomplish the following first;
- Install an instance of ZEVENET on your PC, bare-metal, virtual environment, or at least have an active ZVNcloud account. For on-premise deployment, Request an evaluation.
- Ensure you access the Web User interface by following this quick Installation guide.
- You must be an active user of Broadcom’s Brocade ADX or virtual Traffic Manager and be familiar with the concepts we will discuss in the section below.
- Ensure that you create a virtual server in the ZEVENET load balancer. Here is a quick guide: Layer 4 and Layer 7 Virtual Server Configuration.
Basic Concepts
Service: A program to which clients from the web request access to its resources. This service could be SMTP, HTTP, HTTPS, SSH, RSYSLOG, etc. ZEVENET Services are categorized as Local or Remote. Access and configure services through System >> Services.
Pool: A collection of Nodes delivering the same service and processing requests from the web. With ZEVENET, one may configure a pool through the Backends section in a Farm >> services.
Traffic IP Groups: This is a virtual IP address that listens for external traffic from the Internet. With ZEVENET, create a virtual Interface, then select that IP address as the Virtual IP after creating a Farm.
Virtual Servers: This is the front-facing section of the Brocade ADX. One can assign a port number and a Virtual IP using Traffic IP Group. A virtual server in ZEVENET is the same as a Farm.
Nodes: A node is a member of a pool. It is a backend server placed behind a reverse proxy. It processes user requests and stores their data. A node is the same as a Backend in ZEVENET.
Health Monitor: These programs monitor the availability of backend servers and their services. Health monitors are the same as a Farmguardian in ZEVENET.
SSL Decryption: This functionality enables the load balancer or reverse-proxy to perform SSL Termination on encrypted traffic. Enable SSL Termination/Offloading on an HTTPS profile in ZEVENET by selecting the Cipher as “SSL offloading”.
Service Protection classes: These are settings one specifies to protect the service against a flood of malicious attacks, such as all forms of DDoS. To configure security in ZEVENET, Access the IPDS module.
Activity: This functionality helps an admin keep track of the processes on the ADC. One may visualize all the information through graphs, charts, etc. With ZEVENET, one may view this information through the Dashboard and view statistics and graphs through Monitoring >> Graphs and Monitoring >> Stats, respectively.
Cluster: Used when there is a need to maintain high availability of services even if one of the nodes within a pool fails. With ZEVENET, one may configure a cluster by accessing System >> Cluster.
Example configurations: High Availability
High Availability (HA) ensures that a certain level of operational performance and quality of service is met, despite failures of certain system components. One may achieve HA by setting up multiple redundant components, such as reverse proxies, networks, and storage systems, that provide alternative paths for data to flow if one or more components fail. Each user must have a continued service in the event of component failures.
In this section, we will describe how one may configure High availability in ZEVENET based on configurations of Brocade vTM. We will describe the configurations from either side to make an easier transition.
Brocade configurations
To configure a cluster in Brocade through the Web User Interface, we will take the route of the cluster configurations Wizard. Ensure that you have at least two active nodes with the same configurations.
Instructions:
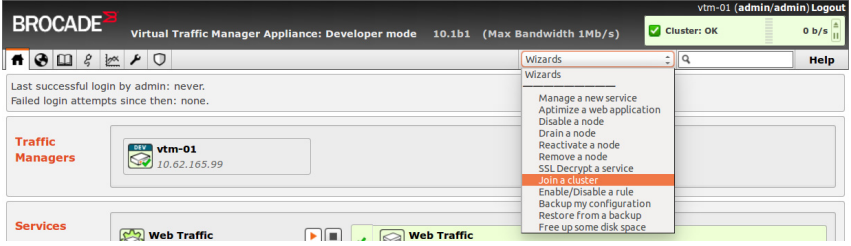
- On the menu, click on the Wizard drop-down menu.
- Select the option Join a cluster. A separate window will show up.
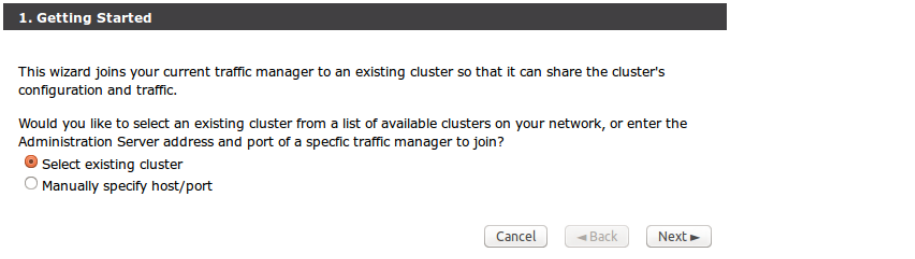
- There are 2 options. Select existing cluster and Manually specify host/port. For these configurations, “Manually specify the host/port” and click Next.
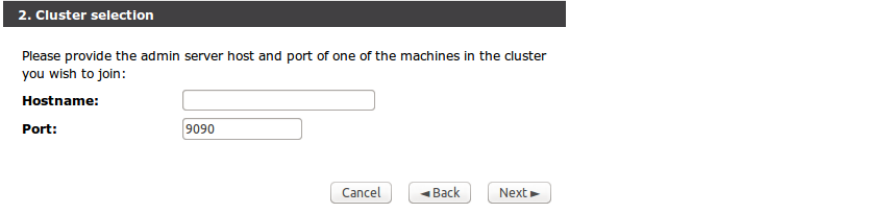
- Enter the Hostname and Port for the remote Node and click Next
- As the Admin, verify the SHA-1 fingerprint by clicking the checkbox beside it.
- Enter a username and password for the remote Node and click Next to continue.
- Confirm with your settings and click Finish to join the cluster.
ZEVENET configurations
ZEVENET implements HA through clusters. Ensure you have 2 ADCs of the same type and version. Ensure both nodes have similar settings and are active.
Instructions:
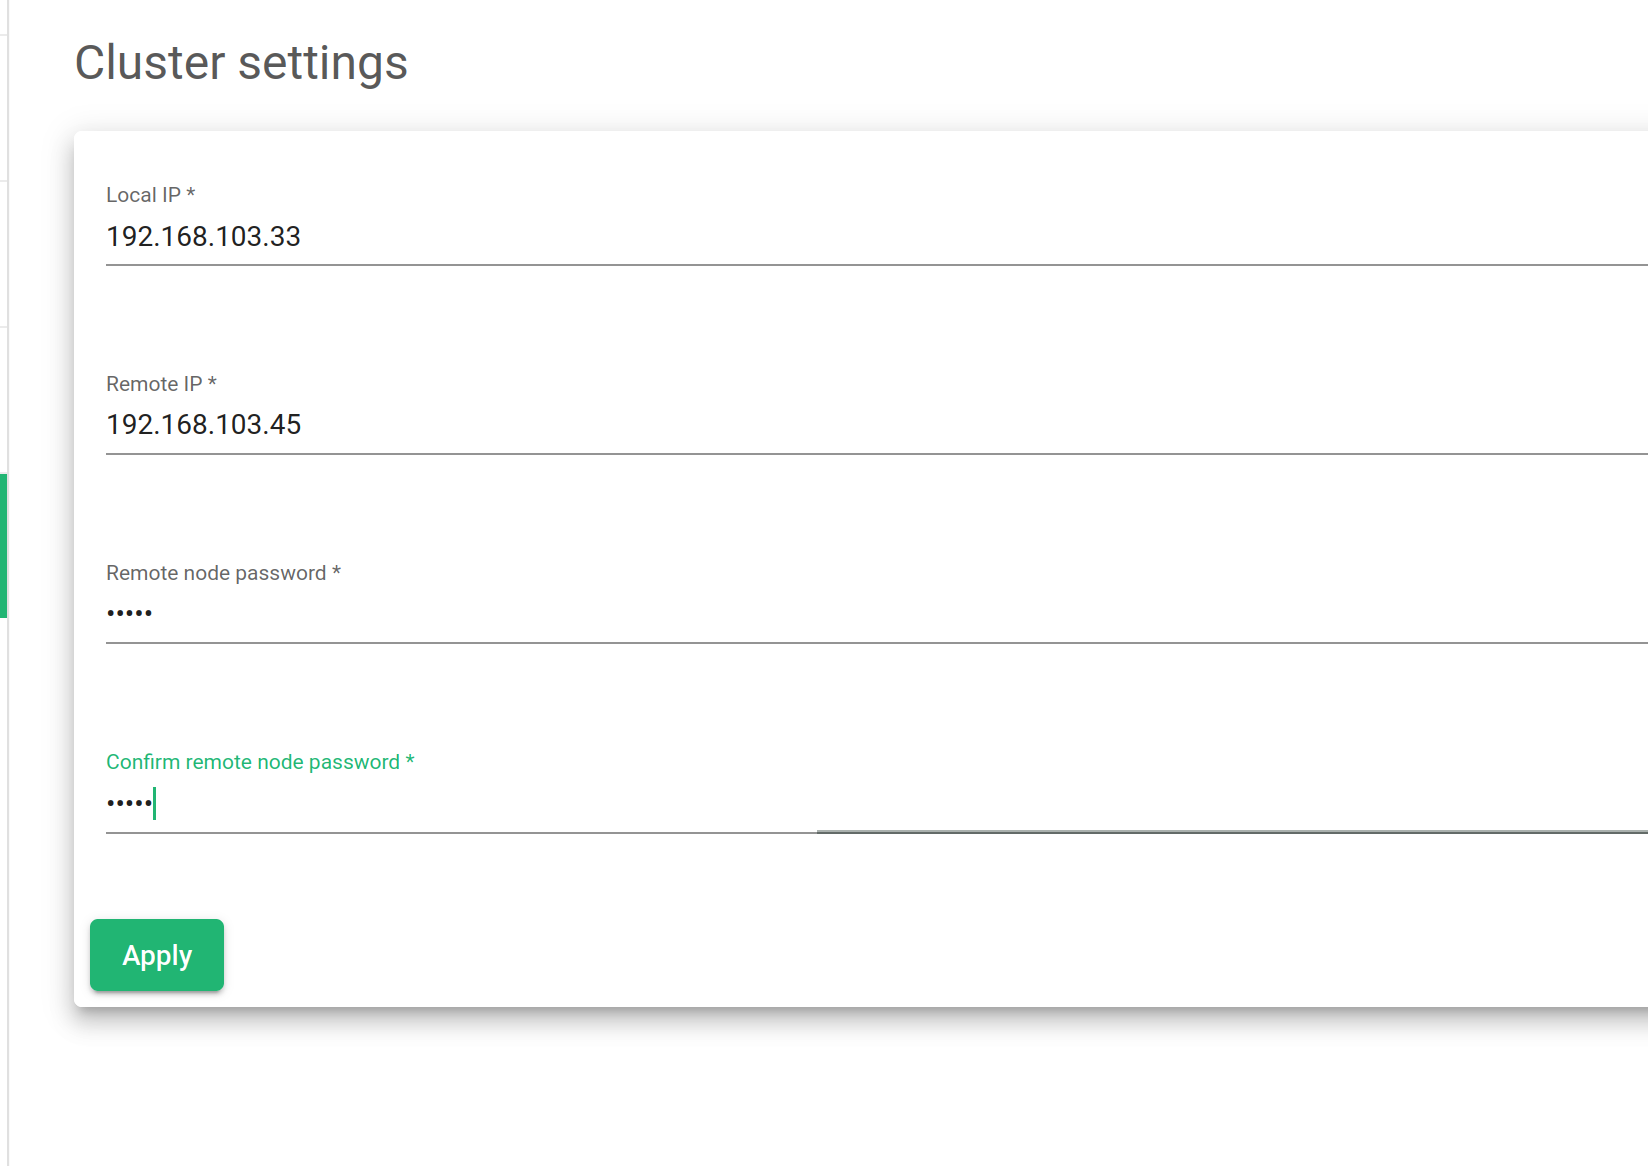
- Click System >> Cluster.
- Select the Local IP address. This will be the IP of the appliance you’re currently using.
- Enter the Remote IP address of the other active Node.
- Enter the Remote Node Password.
- Reenter to Confirm remote node password.
- Click the Apply button to save the configurations.
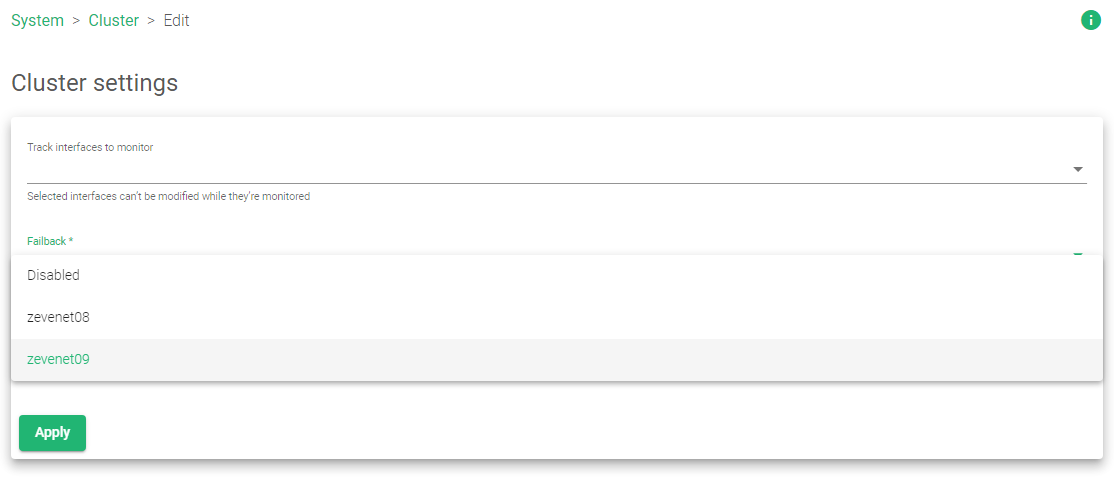
- During a failover, you might wish the load balancing services to return to the Master when it becomes fully functional. Click the Edit button with the pencil icon.
- Click on the Failback* option to configure the Master.
- You may specify the Check Intervals for each node heartbeat.
- Click the Apply button to save the configurations.
For more Information about cluster configurations, Read: System Cluster
For video resources, watch:
Example configurations: Global Load Balancing
Global Server Load Balancing is a technique that distributes network traffic across multiple servers in different geographic locations. It helps to ensure the high availability and reliability of applications by automatically redirecting traffic to alternate servers in the event of a failure. Admins may configure Global load balancers to serve in either Active-Active mode for fast service delivery or Active-Passive mode for redundancy.
In this section, we will configure Global Server Load Balancing in ZEVENET Based on Brocade vTM configurations.
Brocade configurations
For the brocade traffic manager to perform global load balancing, you must; Define the GLB locations, Create Service Monitors for each of your GLB Locations, create a GLB service to manage DNS queries, configure a Pool for your backend DNS Servers, and create a DNS virtual Server that listens for DNS queries.
Instructions:
Defining GLB Locations
- Click Catalogs >> Locations.
- Enter a Name to Identify the location in the Create new GLB Location section.
- Select the Type “GLB”.
- Click Add Location to the GLB Location you created. You will then access the location edit page.
- Choose the Position of the GLB from the drop-down that will be shown.
- Click Update to save the changes.
Creating a service Monitor
- Click Catalogs >> Monitors.
- Within the section Create new monitor, enter the Name, Type, and Scope of the Monitor.
- Click the Create Monitor button. You’ll get access to the edit page.
- One may optionally make adjustments followed by clicking the Update button to save the changes.
- Repeat the process to add other Service monitors to each GLB location.
Creating a GLB Service
- Click Catalogs >> GLB Services.
- Within the Create a new GLB service section, enter a Service Name, Domain(s), and Add locations.
- To access the GLB Service edit page, click Create GLB Service.
- Customize your configurations within this page, and click the Update button to save the changes.
Creating a DNS Server Pool
- Click Services >> Pools.
- Within the section Create a new Pool, add a Pool Name and Nodes, uncheck the box “Use autoscaling”, and optionally specify a Monitor to check DNS health.
- Click Create Pool. You will have access to the edit page.
- Customize your configurations on the edit page, and click the Update button to save the changes.
Creating a DNS Virtual Server
- Click Services >> Virtual Servers.
- Within the section Create a new Virtual Server, enter a Virtual Server Name, the Protocol, e.g. “DNS(UDP) or DNS(TCP)”, choose a Port for incoming traffic, possibly port 53, and choose the Default Traffic Pool.
- Click the Create Virtual Server button. You will have access to the edit page.
- Click GLB Services, and access its edit page.
- Within the section Add new GLB Service, select from the drop-down menu a GLB service you created earlier.
- Set the value for Enabled to “Yes” on the Virtual server edit page.
ZEVENET Configurations
For ZEVENET ADC to perform global load balancing, you must; Create a GSLB Farm, Add a Service, Add Backends, Configure DNS Zones, and Add DNS Security.
Create a GSLB Farm
- Click GSLB >> Farms >> Create Farm.
- Enter a Name to Identify the Farm.
- Select a Virtual IP* from the configured Virtual Interfaces.
- Enter a Virtual Port* 53.
- Click the Apply button to save the configurations.
Add a Service
The service section determines whether you create an Active-Active or Active-Passive Global Load balancer. Let’s consider Active-Active configurations.
- Click the Services tab.
- Click the New Service button.
- Enter a Name to represent the Service.
- Choose the Algorithm as “Round Robbin”.
- Click the Apply button to save the configurations.
Add Backends
- Click the Edit button with a pencil Icon on each listed backend.
- Leave the Alias* field as “Custom IP”.
- Enter the IP* for each Datacenter.
- Click the Apply button for each configuration.
Configure Zones
The Zones section enables the user to add DNS records for the Datacenters.
- Click the Zones tab.
- Click the New Zone button.
- Enter Domain* of the service, e.g., zevenet.com.
- Click the Apply button.
- Click on the Zone you just created to expand it.
- The Default Name Server is “ns1”. You can edit it to ns2 or leave it the way it is, depending on your situation.
- Within the Resources section, click Create Resource.
- Enter the Name to Identify this Record.
- Enter the TTL value in seconds.
- Select the Type* of Resource from the listed DNS records.
- Enter the Data* for that type you just selected.
- Click the Apply button to save the configurations.
Add Security
- To configure DNS security, click the IPDS tab.
- Assuming you have configured Available rules, drag and drop them from the Available box to the Enabled box, e.g., from Available blacklists to Enabled blacklists, Available DoS rules to Enabled DoS rules, or Available RBL rules to Enabled RBL rules.
- Within the Actions section, click the Green play button to enable the Farm.
For more information about GSLB, Read GSLB | Farms | Update
For video resources, watch:
Additional Resources
Using the Let’s encrypt program to autogenerate an SSL certificate.
Datalink/Uplink load balancing With ZEVENET ADC.
Web application protection from DDoS attacks.
Application, Health and Network Monitoring in ZEVENET ADC.
Configuring SSL certificates for the load balancer.
Web Application Firewall configuration.