Contents
Overview
The following article describes a real use case for an ISP or hosting provider, where the HTTP/S Load Balancer reverse proxy is the main point of access to all the public web services, this configuration shows how easy is to configure an advanced and powerful WAF ruleset in order to secure web applications based in blacklist source IP addresses, where each VirtualHost manages its own blacklist in a way that one Public IP can be forbidden to connect to a web domain like www.company1.com but allowed to connect to www.company2.com.
We will focus the article in two sections, in the main section the HTTPS profile configuration will work as a reverse proxy with a list of different services, and the second section will explain how to configure a Web Application Firewall ruleset that will manage a different blacklist per HTTP/S Service.
Environment
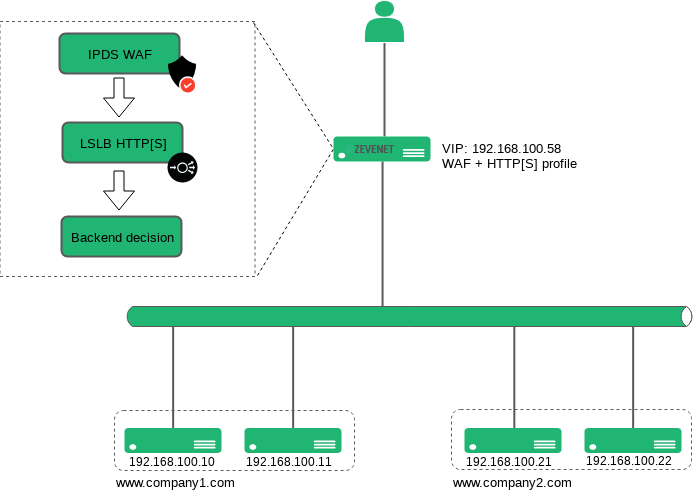
The following diagram describes the Zevenet WAF internals. As it is shown, the first layer is the WAF module whose goal is to ensure in an early stage that only safe requests are allowed to pass-through to the load balancing module and then forward the request to the backends.
Firstly, the HTTP Host header is evaluated and the client IP is checked in the already configured blacklist. If the Host header and the client IP address matches then the connection is dropped and a 403 Forbidden HTTP response is sent to the client, but in the case that the client IP and requested Host header doesn’t match then the traffic is identified as not malicious and passed to the load balancer module, where the destination is chosen based on the HTTP request Host header and finally forwarded to the available backend server.
Here you can find a schema of the Web Application Firewall internals for the given example.
HTTP virtual service configuration
Configure one dedicated Virtual IP address, in our example 192.168.100.58, by browsing to Network > Virtual interfaces > Create Virtual Interface as shown below:

Now let’s go to configure the HTTP load balancing service, go to LSLB > Farms and then click on the button Create Farm and enter the virtual service details as it’s shown below:
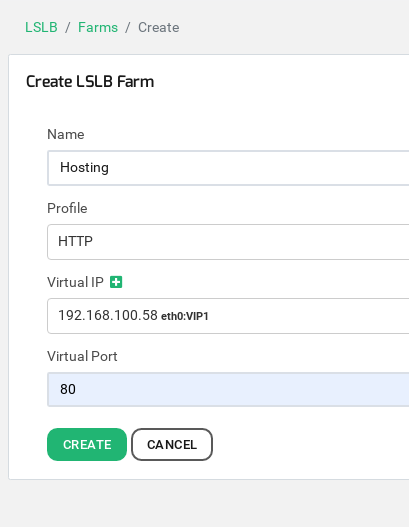
Then press Create.
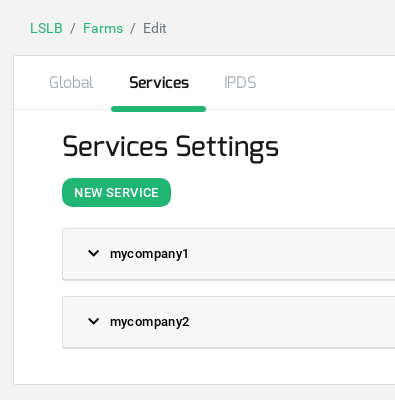
Now click on the upper Tab Services and create as many services as different websites you manage click on the button New Service, in our case, we will create two different services, one to manage the service for www.mycompany1.com and another one for www.mycompany2.com.
Once the service is created, add the Virtual Host filter and the backends as it is shown in the image below.
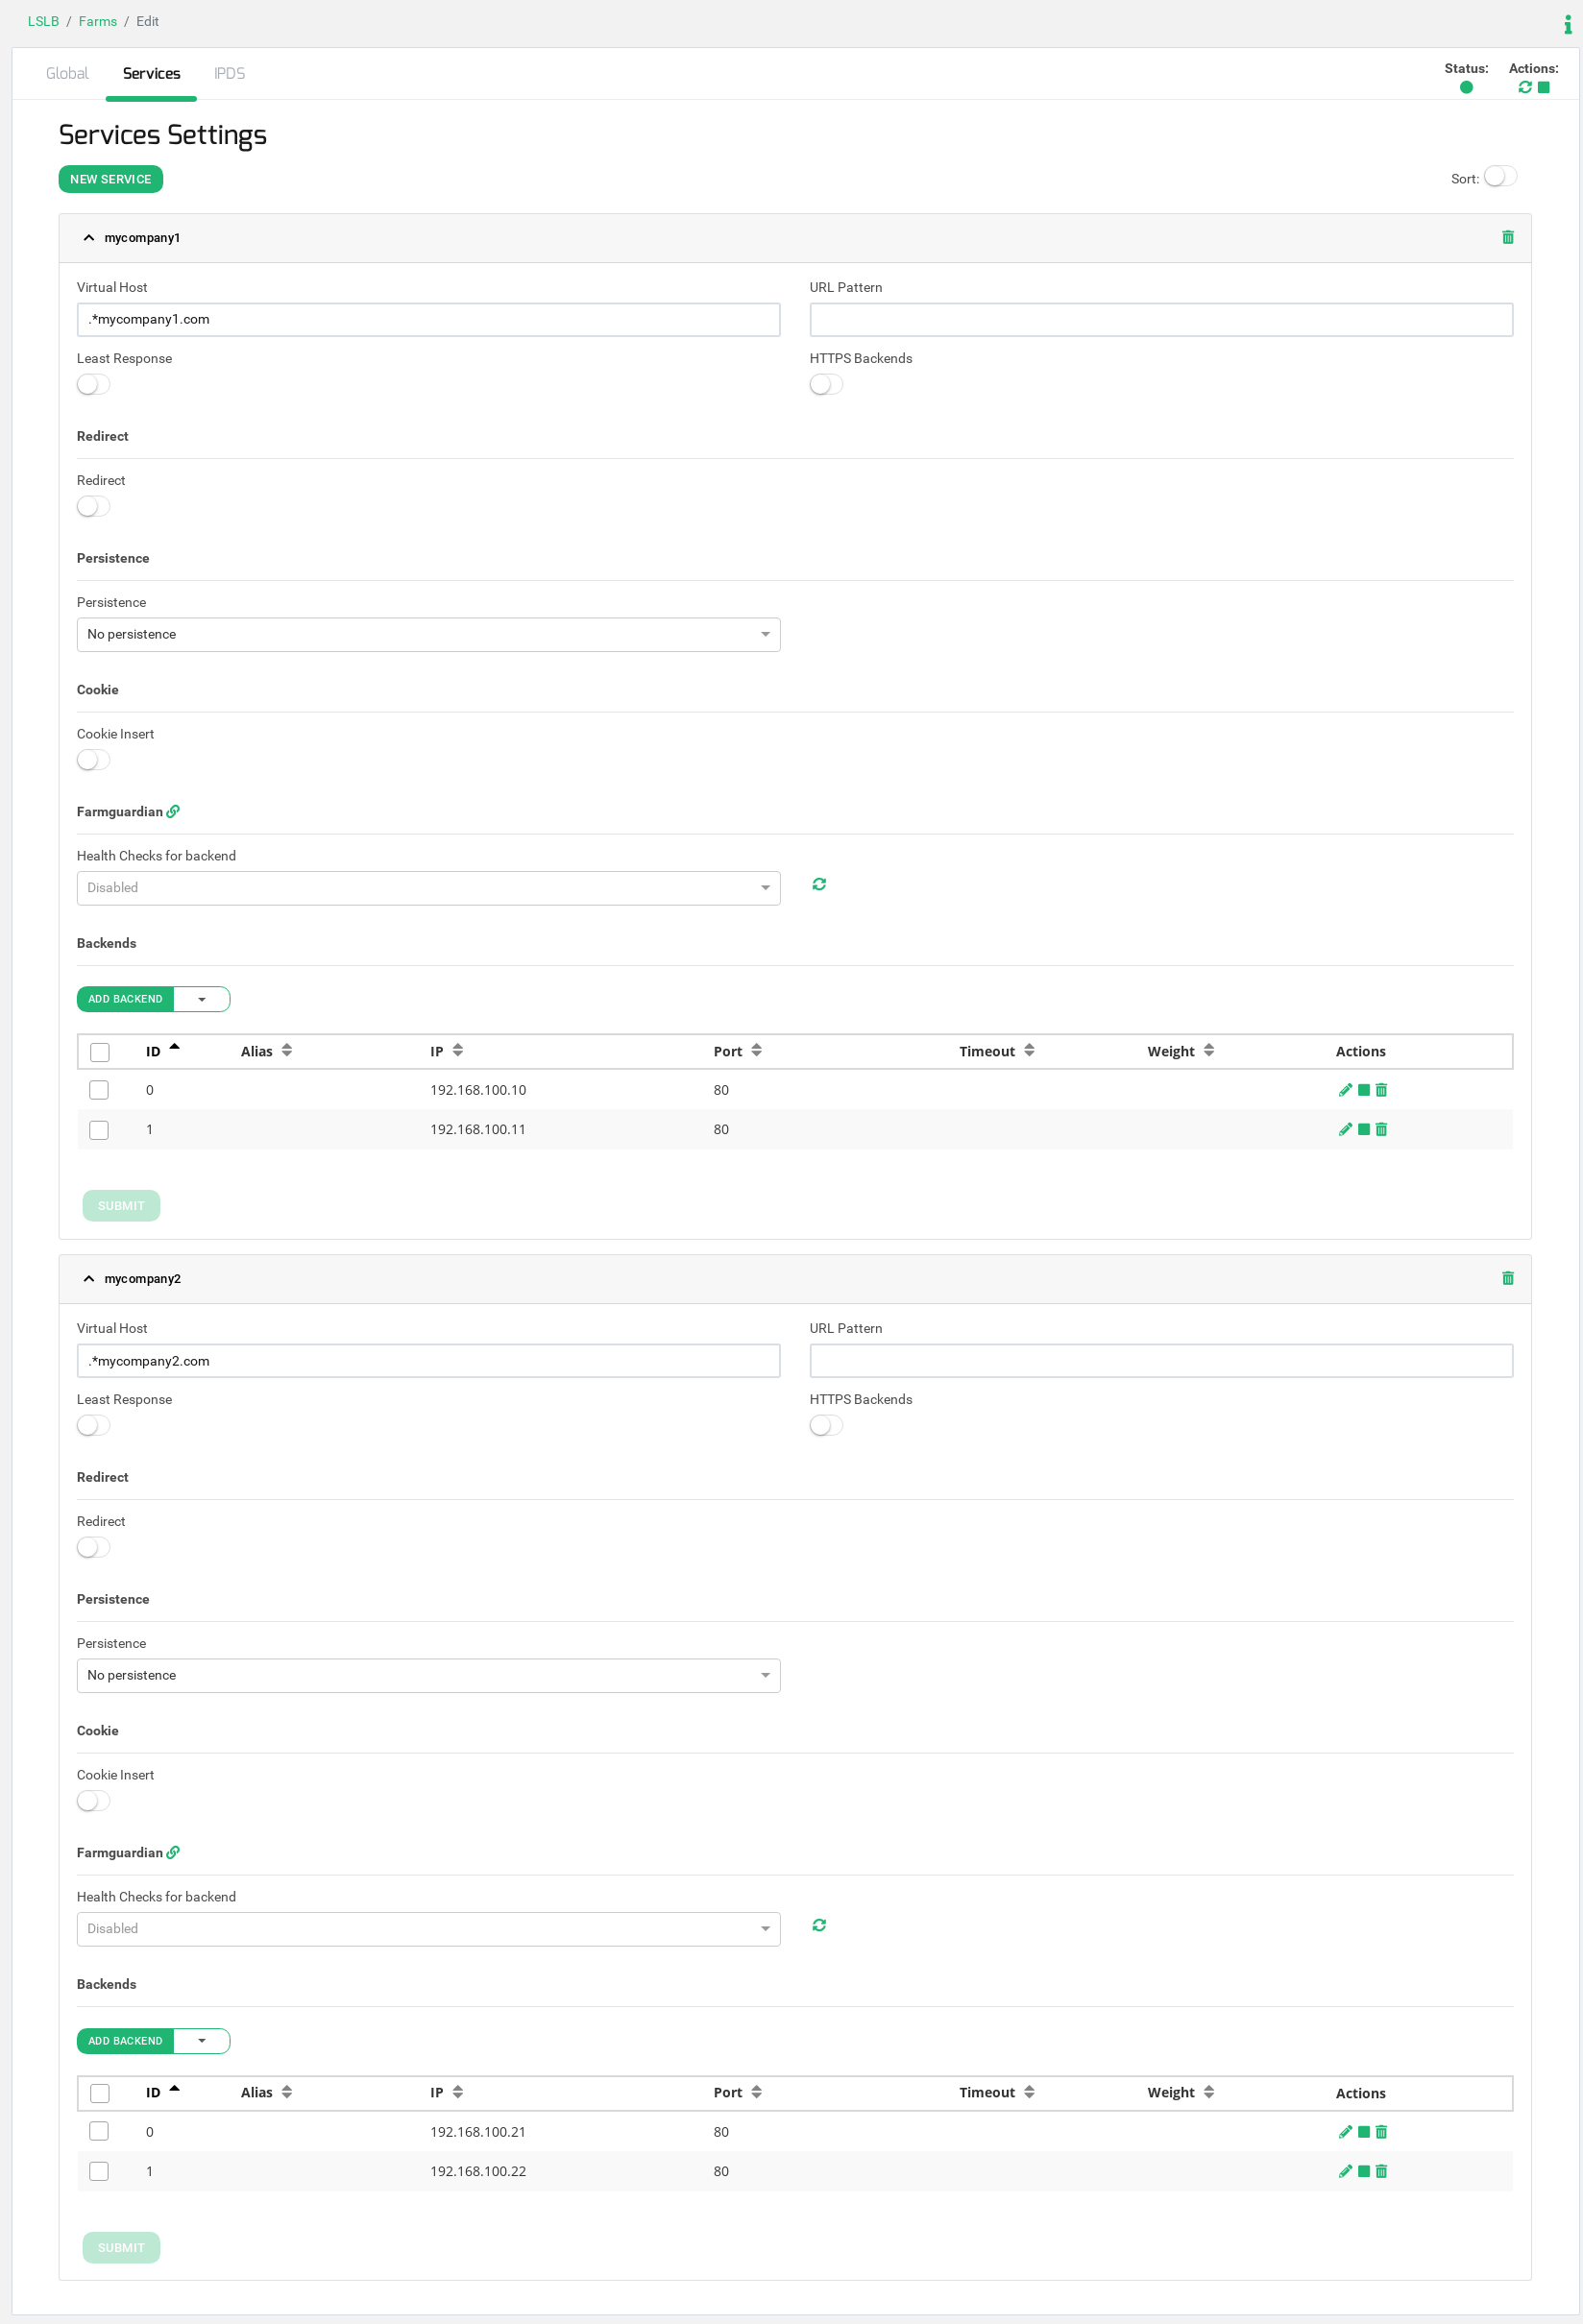
In case you have several websites, you only have to add more services in order to define one dedicated service to manage each web from the same IP address.
Now the load balancing configuration has been done, lets to configure the IPDS Web Application Firewall module.
Blacklists configuration
We are going to create one blacklist per web service in order to enter in each blacklist the desired IP addresses to block the access. In our example, we will create two different blacklists with the name blacklistmycompany1 and blacklistmycompany2, one per service respectively.

This blacklist will be saved in the path /usr/local/zevenet/config/ipds/blacklists/lists/Blacklistmycompany1.txt.
We included 2 IP addresses for testing purposes, please consider to add as many IPs as needed. Also, the already existing Blacklists in the IPDS module can be used.
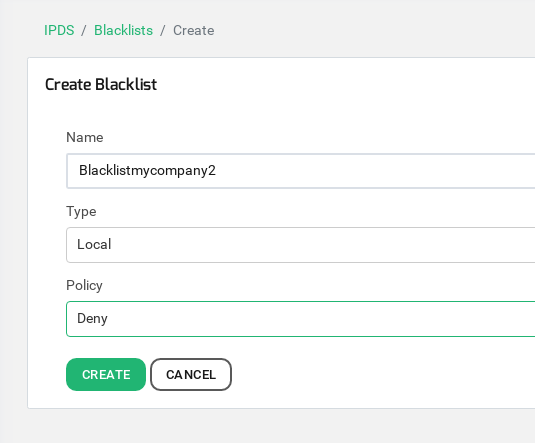
This second blacklist will be saved in the path /usr/local/zevenet/config/ipds/blacklists/lists/Blacklistmycompany2.txt.
Take into account that in this blacklist we included the IP address 192.168.1.191, this IP will be used for testing purposes only, from where we will run HTTP requests.
Web Application Firewall ruleset configuration
The purpose of this configuration is to maintain different IP blacklists per website, in order to avoid to keep the same blacklist for the whole farm access point.
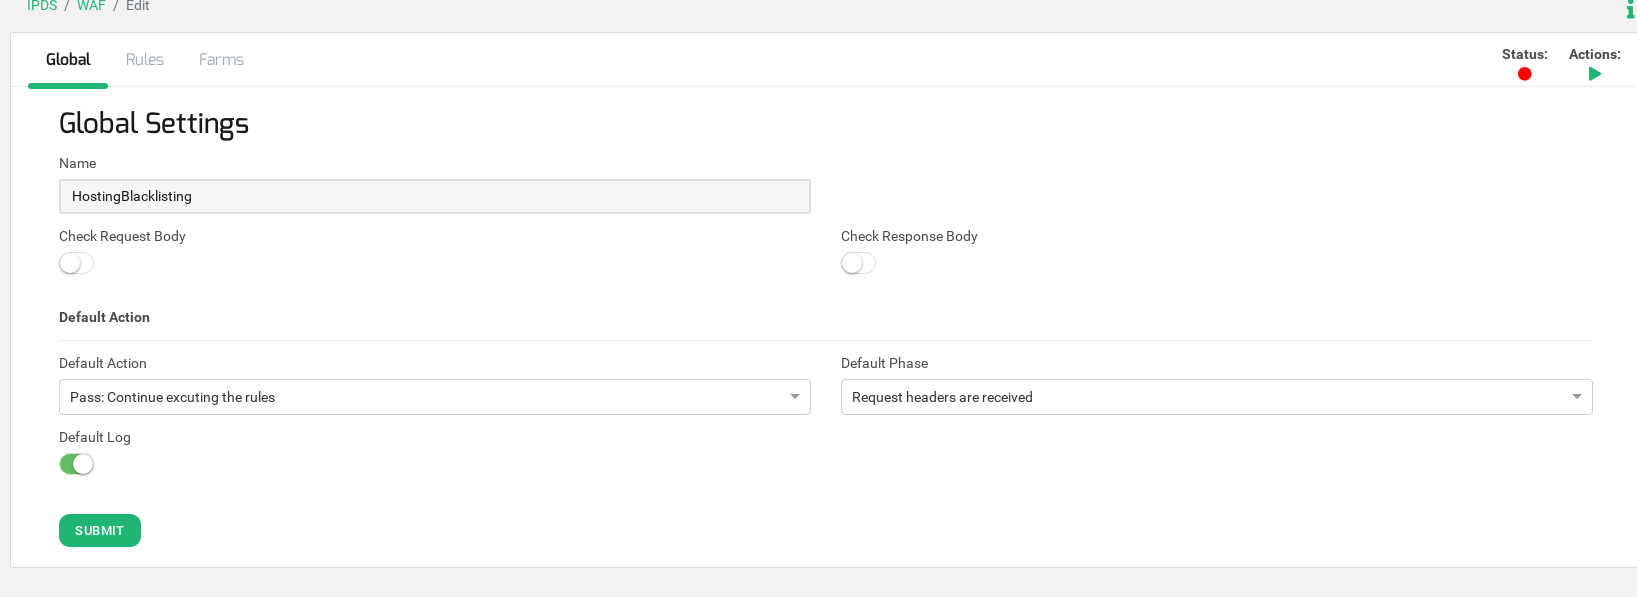
We are going to configure a ruleset, which is a group of rules, with name HostingBlacklisting. This ruleset will be composed by two simple rules (rule ID 1000 and rule ID 1001 in our example), each rule is defined as a match and an action, where if the condition matches then the action is executed. In our example, we will use the same action in both rules, if the condition matches a Reject Action is executed with a 403 Access Denied response.
Go to IPDS > WAF, then click on Create WAF ruleset and set a descriptive ruleset name, in our example HostingBlacklisting.
Configure the field Default phase to Request headers are received. This field means that the WAF module will analyze the incoming request headers from the client.
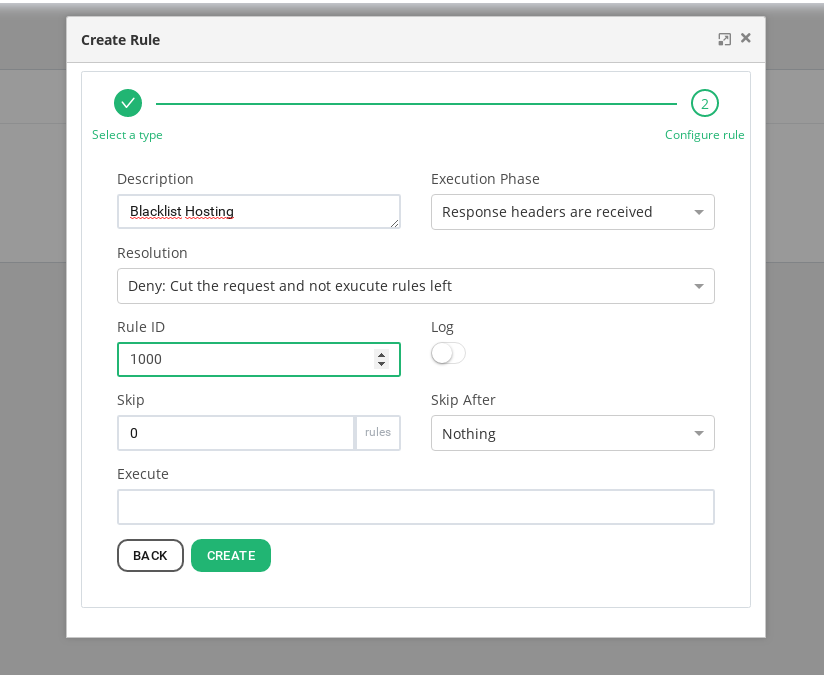
Then go to the tab Rules and create the first Rule of type Action as it is shown below.
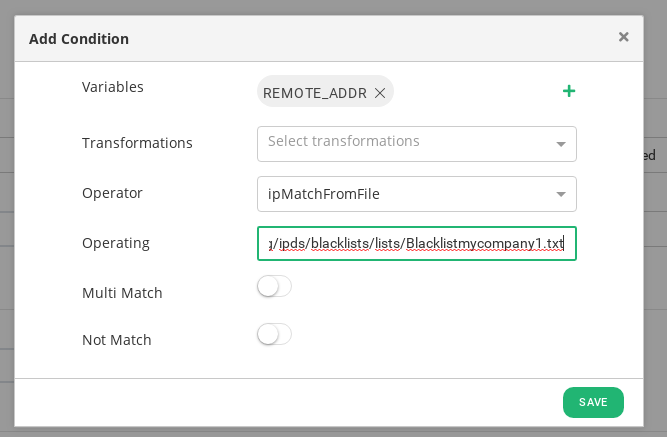
Now the first rule of the ruleset is created, lets to create the conditions in order to match the client IP in the blacklist for each Host header. Go to Conditions and create a condition according to the REMOTE_ADDR variable as it is shown below.
Then create another condition for the Virtual Host match according to the SERVER_NAME variable as follows:
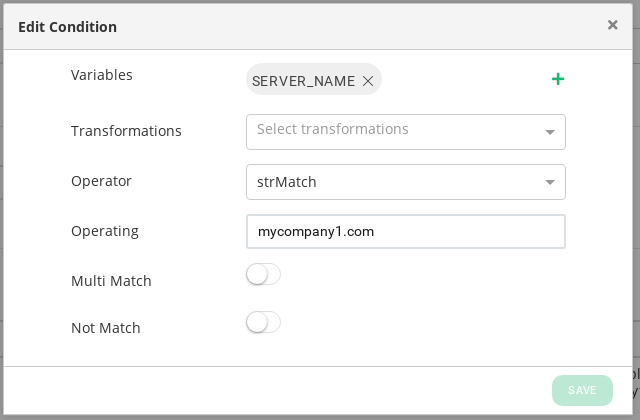
At this point, the first hosted website www.mycompany1.com manages a web application blacklist IP address from the already configured blacklist, referred to Blacklistmycompany1.txt.
Let’s create another rule for the second website www.mycompany2.com and repeat the same configuration as the previous rule configuration but in this case, you have to change the SERVER_NAME to mycompany2.com and do refer to the following blacklist2.txt.
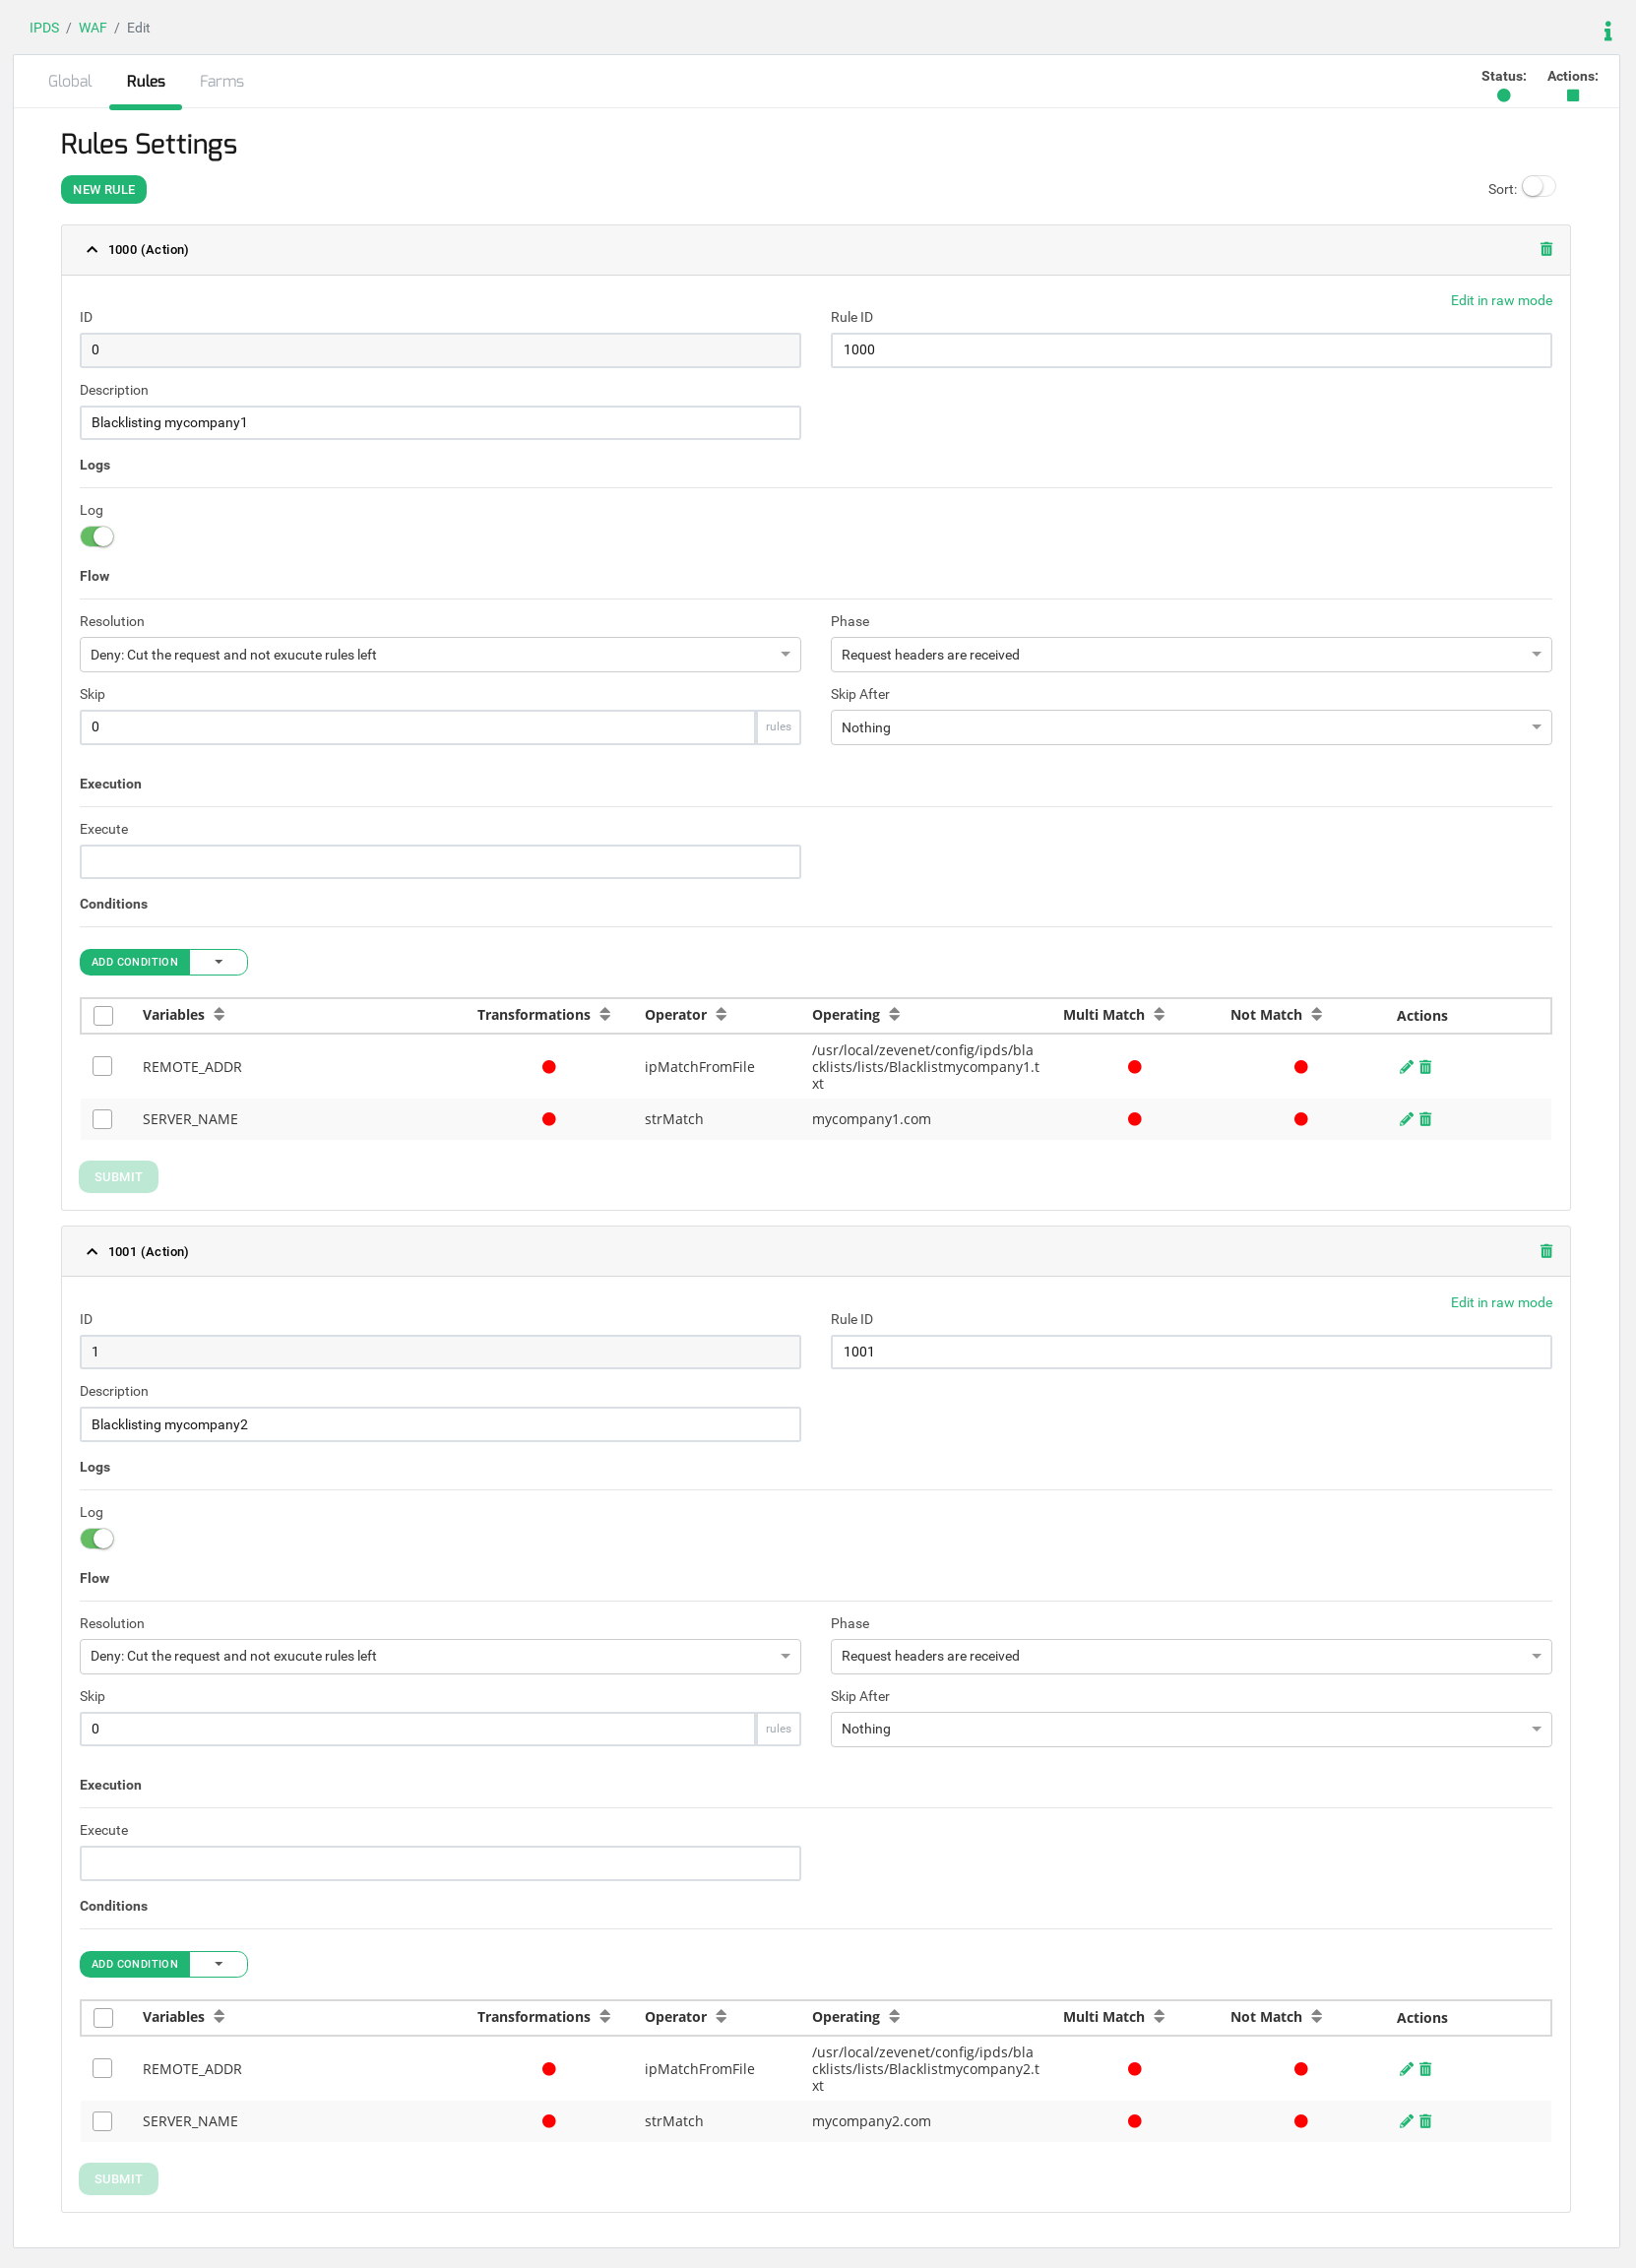
See the entire configuration of the compounded WAF ruleset:
Finally, add this ruleset to the already created farm, go to the tab Farms and move the farm Hosting, in our example, to the Enabled farms section as it is shown below.
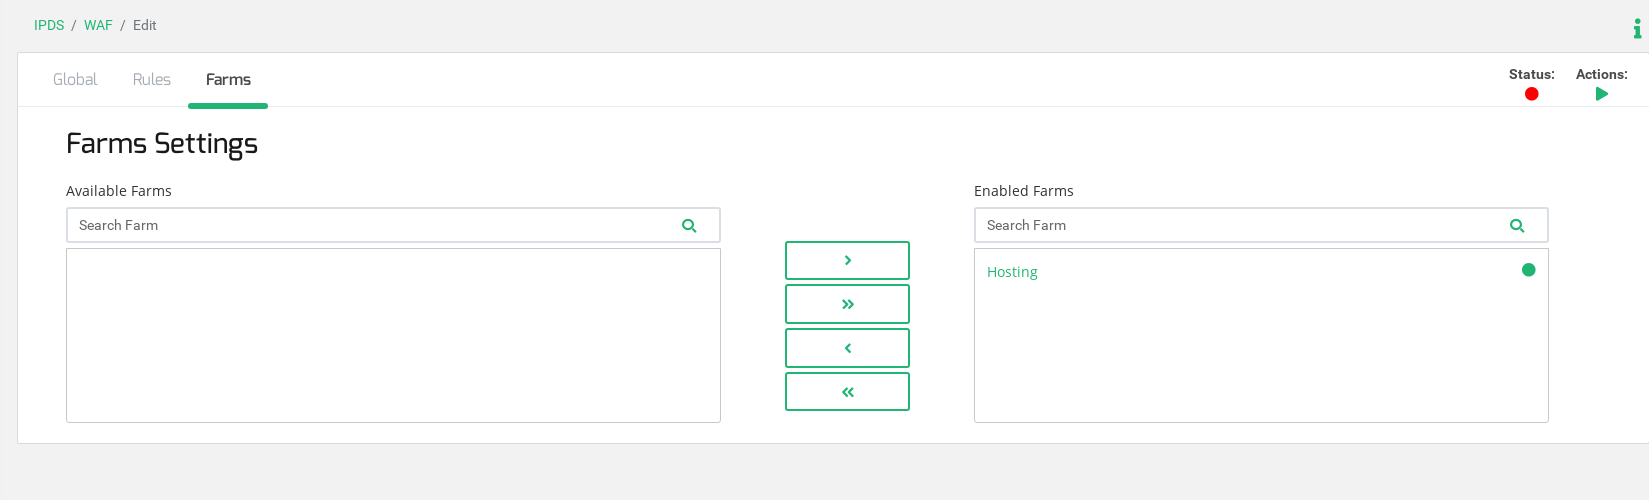
Now start the WAF ruleset for the farm, click the action Play in the upper left section of this window, and the system will start to filter HTTP traffic for the Farm Hosting.
Testing the Web Application Firewall ruleset
The client IP 192.168.1.191 will request the website http://www.mycompany1.com and http://www.mycompany2.com and, according to our configuration, the WAF system will allow connecting to the first service with the same name but the connection will be denied to mycompany2.com because this IP has been included in the blacklist with name Blacklistmycompany2.
From IP address 192.168.1.191 to VIP requesting the website www.mycompany1.com through the load balancer:
root@192.168.1.191:# curl -H "Host: www.mycompany1.com" http://192.168.100.58 -v
* Rebuilt URL to: http://192.168.100.58/
*   Trying 192.168.100.58...
* TCP_NODELAY set
* Connected to 192.168.100.58 (192.168.100.58) port 80 (#0)
> GET / HTTP/1.1
> Host: www.mycompany1.com
> User-Agent: curl/7.52.1
> Accept: */*
>
< HTTP/1.1 200 OK
< Server: nginx/1.10.3
< Date: Tue, 10 Sep 2019 15:36:22 GMT
< Content-Type: text/html
< Content-Length: 11383
< Last-Modified: Thu, 13 Dec 2018 11:01:49 GMT
< Connection: keep-alive
< ETag: "5c123c1d-2c77"
< Accept-Ranges: bytes
<
From IP address 192.168.1.191 to VIP requesting the website www.mycompany2.com through the load balancer:
root@192.168.1.191:# curl -H "Host: www.mycompany2.com" http://192.168.100.58 -v
* Rebuilt URL to: http://192.168.100.58/
*   Trying 192.168.100.58...
* TCP_NODELAY set
* Connected to 192.168.100.58 (192.168.100.58) port 80 (#0)
> GET / HTTP/1.1
> Host: www.mycompany2.com
> User-Agent: curl/7.52.1
> Accept: */*
>
* HTTP 1.0, assume close after body
< HTTP/1.0 403 Request forbidden
< Content-Type: text/html
< Content-Length: 17
< Expires: now
< Pragma: no-cache
< Cache-control: no-cache,no-store
<
* Curl_http_done: called premature == 0
* Closing connection 0
replied forbiddenp
Once the Forbidden response is generated, the WAF module notifies the reject in the load balancer Syslog file.
root@zva6000:# tail -f /var/log/syslog
Sep 10 15:38:44 zva6000 pound: Hosting, ModSecurity: Warning. Matched "Operator `StrMatch' with parameter `mycompany2.com' against variable `SERVER_NAME' (Value: `www.mycompany2.com' ) [file "/usr/local/zevenet/config/ipds/waf/sets/HostingBlacklisting.conf"] [line "17"] [id "1001"] [rev ""] [msg "Custom Match 2"] [data ""] [severity "0"] [ver ""] [maturity "0"] [accuracy "0"] [hostname "192.168.100.58"] [uri "/"] [unique_id "156812992458.770641"] [ref "v0,13v21,18"]
Sep 10 15:38:44 zva6000 pound: Hosting, [WAF,service mycompany2, backend 192.168.100.22:80,] (7f6cfac3c700) [client 192.168.1.191] ModSecurity: Access denied with code 403 (phase 1). Matched "Operator `StrMatch' with parameter `mycompany2.com' against variable `SERVER_NAME' (Value: `www.mycompany2.com' ) [file "/usr/local/zevenet/config/ipds/waf/sets/HostingBlacklisting.conf"] [line "17"] [id "1001"] [rev ""] [msg "Custom Match 2"] [data ""] [severity "0"] [ver ""] [maturity "0"] [accuracy "0"] [hostname "192.168.100.58"] [uri "/"] [unique_id "156812992458.770641"] [ref "v0,13v21,18"]
Sep 10 15:38:44 zva6ktpl1 pound: Hosting, service mycompany2, backend 192.168.100.25:80, (7f6cfac3c700) WAF denied a request from 192.168.1.191
Now you can build your custom firewall rulesets to protect your web applications using HTTP/S deep packet inspection techniques.