Contents
Overview
The goal of this article is to explain how to magnify the capabilities of MS Print Server by making it massively scalable and by setting it up in high availability in order to be tolerant to failures, and how to reinforce cybersecurity.
What is high availability?
High availability is a quality of a system or component that assures a high level of operational performance, usually uptime, for a higher than normal period of time. By setting up MS print server in high availability, we solve the following issues:
A single server loses efficiency when handling a large amount of requests.
Session data is preserved in case of server failure.
Updating application without discontinuing service.
What is a print server?
A print server or printer server, is a server in charge of connecting printers to client computers over a network. Print servers usually work in TCP and UDP port 170, but in this guide we will focus on Microsoft printer server which uses the following the protocols for network print services (Note that some protocols might not be used, depending on the needs of the client computers).
Server Message Block (SMB)
Line Printer Remote (LPR)
Line Printer Daemon (LPD)
Remote procedure call (RPC)
Internetwork Packet Exchange (IPX)
Internet Printing Protocol (IPP)
Transmission Control Protocol/Internet Protocol (TCP/IP)
AppleTalk
Simple Network Management Protocol (SNMP)
For further information about these protocols, please check How network printing works .
Setting up Zevenet Load Balancer
To follow these instructions it’ll be required to install at least one instance of Zevenet Load Balancer and several instances of Windows Server. Other vendors only offer a single configuration of this service through DSR (Direct Server Return), but in this article, we will offer an alternate solution, where we will avoid the DSR drawbacks, which are:
Backend servers have to increase the amount of work that they must do, responding to health check requests with their own IP address and to content requests with the VIP assigned by the load balancer.
ARP requests must be ignored by the backends. If this is not the case, the VIP traffic routing would be bypassed as the backend will establish a direct two-way connection with the client.
Application acceleration is not an option. The load balancer does nothing regarding the handling of outbound traffic.
No way to implement cookie insertion and port translation
There is no way to handle SOAP/Error/Exception issues.
Protocol vulnerabilities are not protected.
Caching needs to take place on the routers using WCCP. This solution adds complexity and it is error-prone.
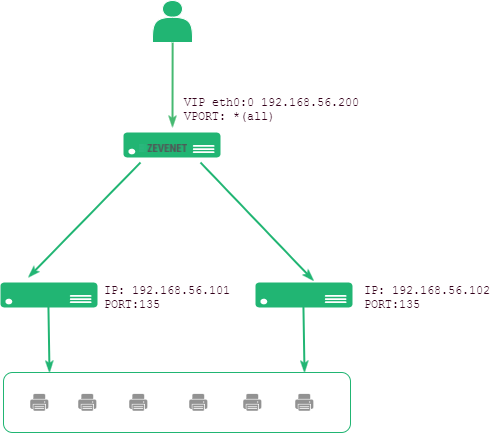
The environment we are going to describe is the following:
Step 1: Create virtual IP
To create a new virtual IP, from the Zen Load Balancer main menu, select Network >> Virtual Interfaces.
Go to button Actions, and select Create network interface:
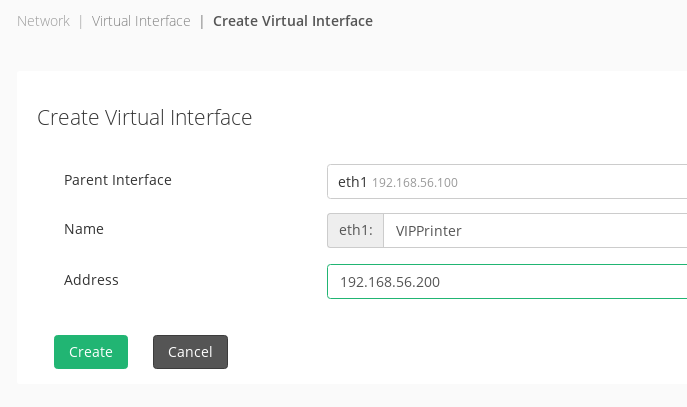
Type the address and netmask of your new virtual IP, it must be in the same subnet as the physical device. Save it by clicking on Create.
Step 2: Create L4XNAT farm
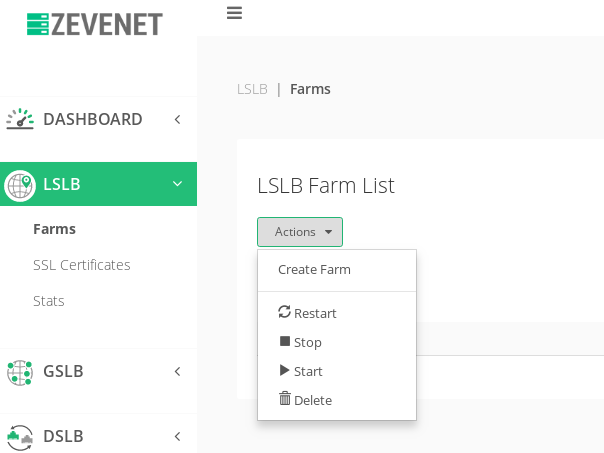
A farm is a collection of computer servers that provide server functionality increasing significantly its capability. This way, by setting up a farm of application servers, we will increase its performance, which is essential for high availability. In order to achieve this go to LSLB >> Farms, press in the upper button Actions >> Create Farm.
In the next window, type a descriptive name for the new Farm, for example, “MSPrint”, select the profile L4xNAT, select the Virtual IP already configured 192.168.56.200 and finally set the PORT to *.
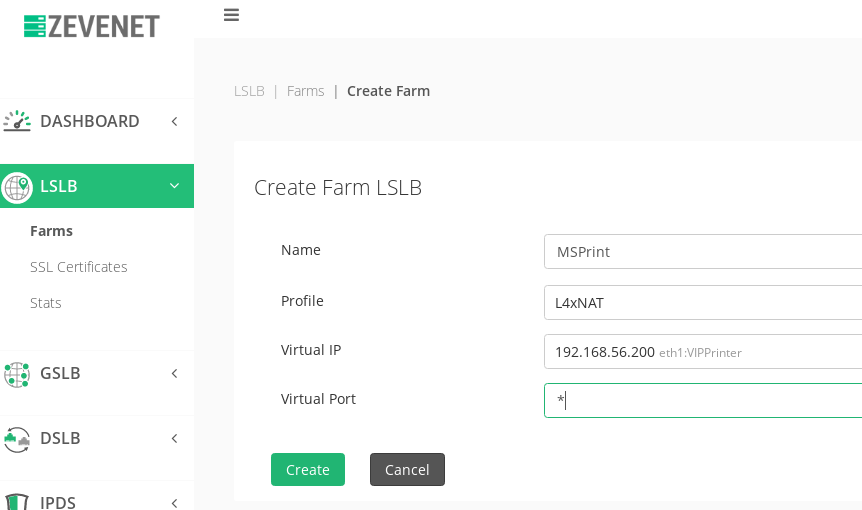
By setting the port as *, the farm will be available at any port. Once done, click on the Save button. This particular setting allows the printing service to be offered by several different protocols.
Step 3: Farm parameters
Once the farm has been created, we have to edit it in order to set up more parameters. Switch to Advanced View in the Global Settings, and advanced parameters will be shown, please configure this section as is described in the following lines:
The option NAT type should be set to NAT. Note that NAT stands for Network Address Translation, and it is a method of remapping one IP address space into another. This is achieved by modifying network address information in the IP datagram packet headers while they are in transit across a traffic routing device. In simpler words, it translates the IP addresses of computers in a local network to a single IP address.
In our example we will set this parameter as NAT as well known as source NAT. If the user needs transparency (client’s IP in the backend service) then we should set up DNAT.
Now press in tab Service, and do the configuration parameters as follows:
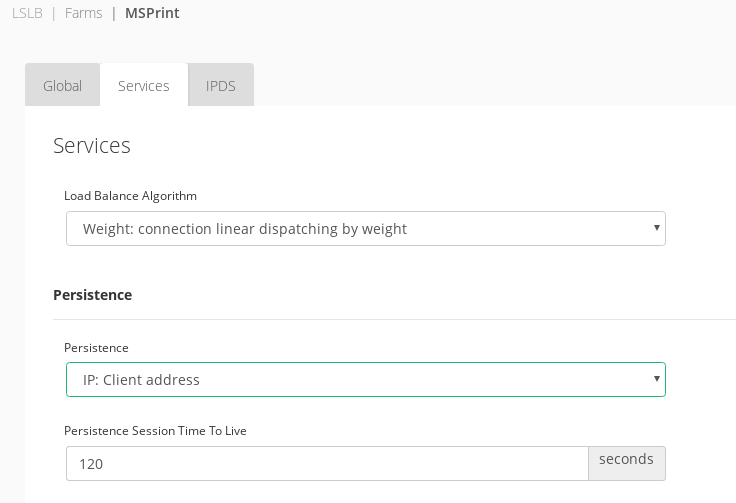
We want to avoid server commutation: if during our printing session the client jumps from one server to another we might end up printing in several printers which would lead to chaos. We can avoid this situation by setting up the Persistence and selecting IP Client address. This way, the same client will connect always to the same server.
Step 4: Advanced health checks
We will now set up the farm guardian in order to perform advanced health checks to the backends ensuring that they’re up, running and the print server is UP. Please locate the Farm Guardian section, Monitoring >> Farmguardian. Click on Actions, and then Create Farmguardian:
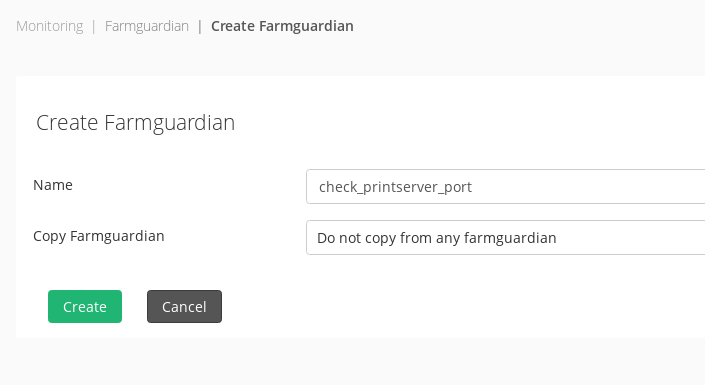
Please fill the form as shown in the previous image, notice that those fields are just informational.
Press in Create, and configure the form as proposed below:
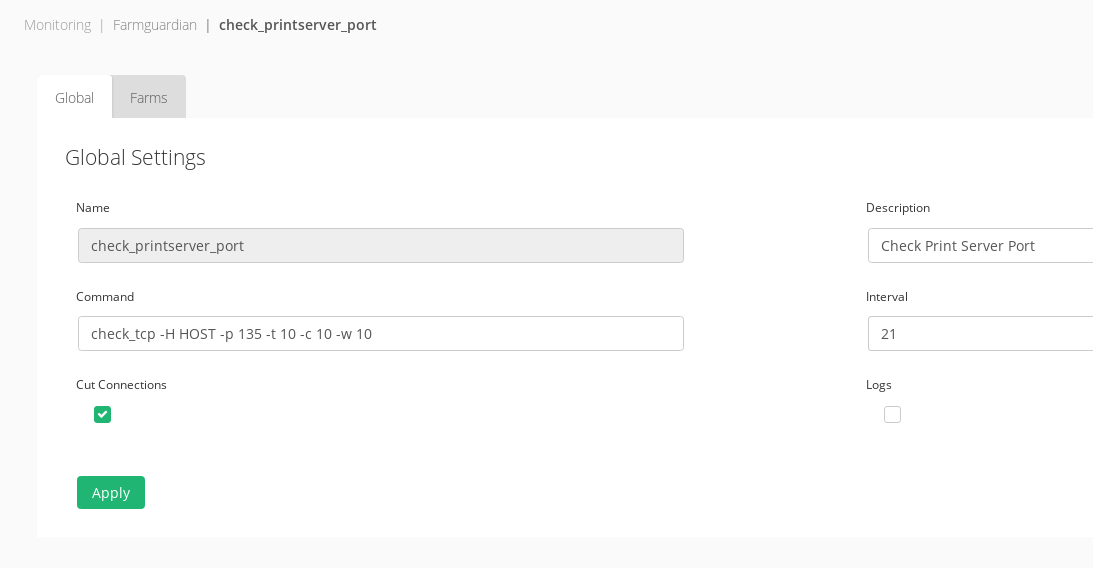
Description: Check Print Server Port. This field is informational.
Command:
check_tcp -H HOST -p 135 -t 10 -c 10 -w 10
-H HOST: IP or address name, in our case, name is HOST.
-p 135: port to check, in the case of L4xNAT with all ports defined in the backends it can’t be PORT, we need to define a specific port like 135.
-t 10: 10 seconds before connection times out. This parameter should be customized in regards to the response times you’ve obtained for your backends.
-c 10: response time to critical status, by default 10 seconds.
-w 10: response time to result in warning status, by default 10 seconds.
The Interval proposal would be 21 seconds.
And cut connections enabled.
Step 5: Configure the backends
In this point, we have to configure the Backend servers IP where the real Service is configured, in other words, where the Microsoft Print Server is running and enabled
Please go back to edit the already created L4xNAT farm “MSPrint”, press in lateral menu LSLB >> Farms, in the main table search the farm “MSPrint” and press the edit action, once the configuration Farm is loaded in a new Form press in the upper tab Services go to Farm Guardian section and drop down the select field, please choose here the already configured farm guardian health check with name check_printserver_port and press the Update button.
Now the last step is to add in the Backends table the backend servers where MS Print server is running.
Go to table Backends and press button Actions >> Add Backend, and enter here the IPs of the backends as shown in the image.
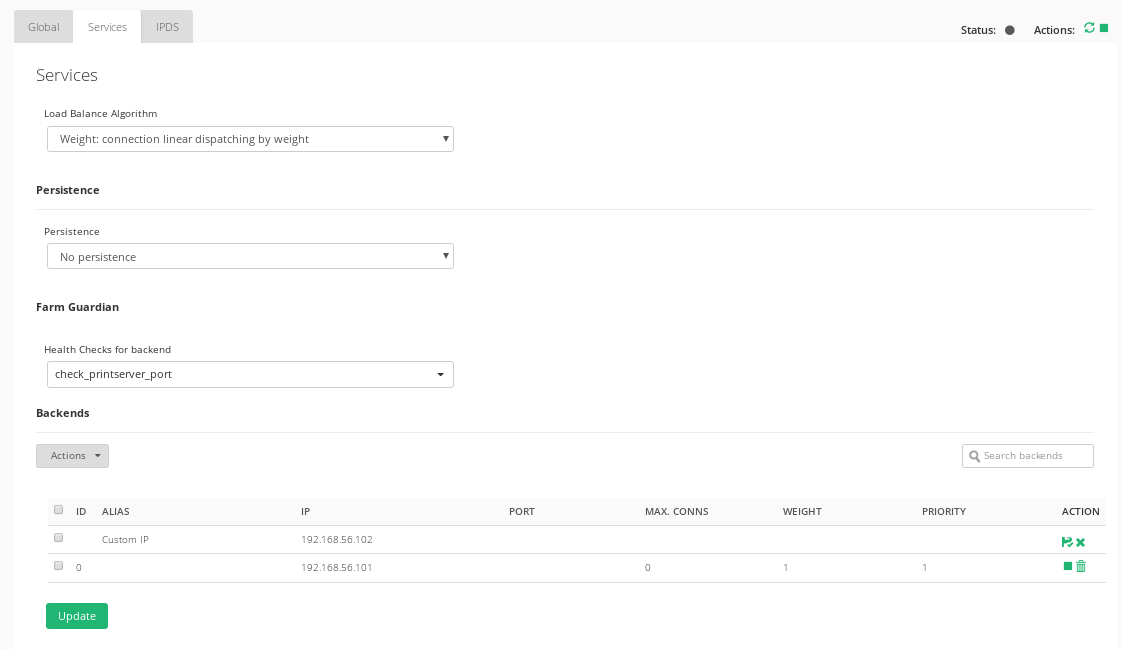
Notice that it does not need to configure the port and the other values in this table doesn’t need special attention for this approach.
Step 6: MS Print Server setup
Everything is done in Zevenet Load Balancer. Now it is time to apply some changes in the MS Print Server. By other hand, in each backend server the file hosts should be modified. By default in Microsoft windows this file is located in the path C:\windows\system32\drivers\etc.
Following our example, we have to take into account that clients will connect to the FQDN printserver.mydomain.com or a NetBIOS name printserver that in both case will resolve the VIP 192.168.56.200. That we are going to do in each Print Server is forcing the resolution IP of used names printserver.mydomain.com or printserver to resolve each local server IP.
In every backend please add:
<OWN_BACKEND_IP>        <SERVICE_DOMAIN>
<OWN_BACKEND_IP>        <SERVICE_NAME>
In our example, on the backend 192.168.56.101, add the following line:
192.168.56.101        printserver.mydomain.com
192.168.56.101        printserver
and on the backend 192.168.56.102:
192.168.56.102        printserver.mydomain.com
192.168.56.102        printserver
And restart both print services.
With these steps, the client is ready to connect to the print service in high availability.