Contents
Overview
The Microsoft web server, Internet Information Services (IIS), integrates several authentication mechanisms in order to validate users against an Active Directory or stand-alone (LDAP based authentication) systems. NTLM is the Windows Challenge/Response authentication protocol that can be used in networks and applications that could be used in both environments.
Two different scenarios could be taken into account: Interactive NTLM authentication is compound of two systems a client and a domain controller which is used to store the users data required to serve authentications, and Non-interactive NTLM authentication involves three different systems a client, an application server and a domain in order to allow a user to access to a certain resource in an application.
ASP.NET impersonation permits to web applications to authenticate and authorize users that rely on Microsoft IIS.
In this article we’re going to explain how to load balance applications that integrates the NTLM protocol for non-interactive users authentication scenarios.
How does NTLM work?
NTLM protocol relies on HTTP/S protocol where a given client starts a handshake of a total of 6 steps in order to establish the authenticated session.

The authenticated session handshake requires the following steps:
1. The client initiates an anonymous request of a certain resource to a web server.
GET / HTTP
2. The server responses with a non-authorized message and the authentication method that the client have to use.
401 Unauthorized
WWW-Authenticate: NTLM
3. The client resends the request including a NTLM format authentication challenge.
GET / HTTP
Authorization: NTLM <base64-encoded first NTLM message>
4. The server responses with a non-authorized message and requests for more information to the client.
401 Unauthorized
WWW-Authenticate: NTLM <base64-encoded second NTLM message>
5. The client resends the request including a remainder of the session information.
GET / HTTP
Authorization: NTLM <base64-encoded third NTLM message>
6. The server connects with the domain controller to complete the authentication request and then confirms to the client the authentication.
HTTP 200 OK
Note that this handshake is required in every new connection, not HTTP requests, and during the steps 3 to 6, the connection requires to be kept alive. If the connection is closed, this part of the handshake should be repeated and it’s not valid to just repeat from the step 5. On the other hand, once the connection is authenticated, the Authorization header doesn’t need to be sent again while the connection is not closed independently of the resource accessed.
How to load balance web applications using NTLM authentication?
With Zevenet, there are 2 main ways to load balance and build a NTLM based web application in high availability, with a simple layer 4 TCP load balancer or with a layer 7 proxy for advanced features.
Simple NTLM load balancing at layer 4
In order to load balance web applications with NTLM authentication support with a simple configuration, we can create LSLB based farms with L4xNAT profile. We can use either HTTP or HTTPS protocols.
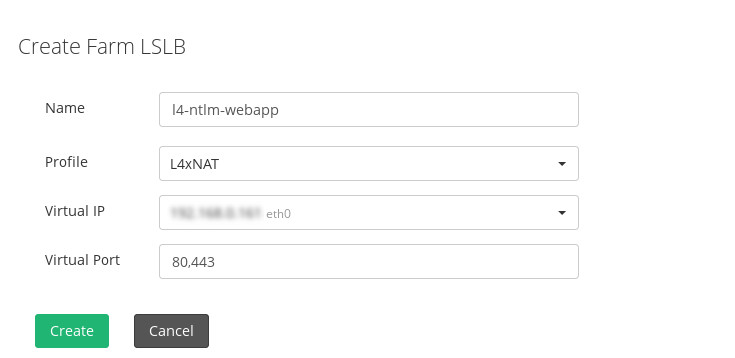
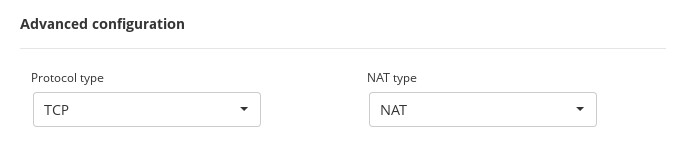
Then, in the global configuration ensure that the protocol used is TCP but we can select NAT or DNAT according to the topology required.
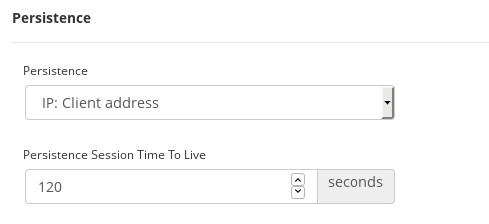
In the Services section, it’s required to set the persistence in order to ensure that the authentication for a certain client always goes to the same backend, otherwise the connection authentication could not be performed.
Finally, add your list of backends and configure a health check as indicated in the sections below.
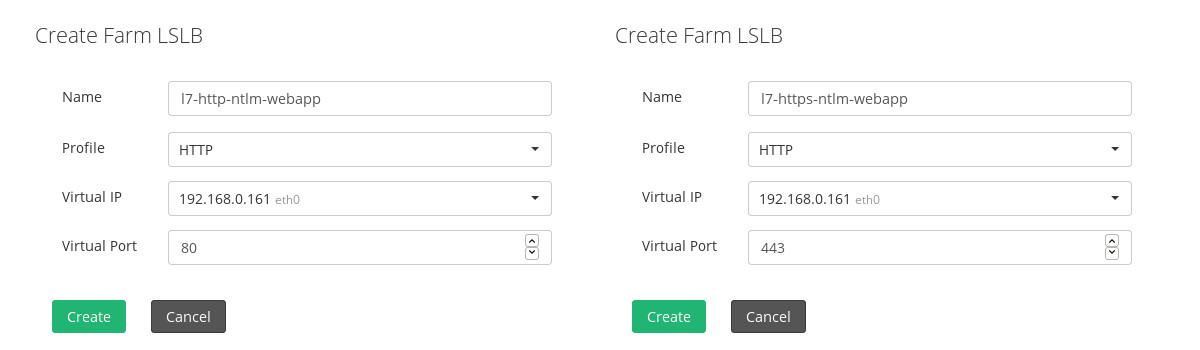
NTLM load balancing at layer 7
This options allows to handle the HTTP/S data with NTLM support with the layer 7 proxy configured through LSLB module and HTTP farm. For this, we need to create a farm for HTTP or HTTPS according to the SSL requirements for the virtual service. The only difference would be the Listener configured in the Global Settings of the farm created.
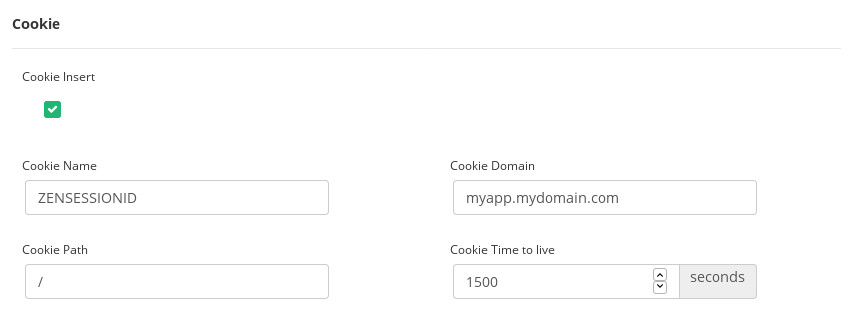
At this layer, as the application is not able to create any session cookie yet in order to create a persistence or connection pinning, we can make use of the Cookie Insertion option that permits the load balancer to create a new cookie during the initial handshake of the NTLM authentication.
Finally, add your list of backends and configure a health check as indicated in the sections below. You can configure additional application options at proxy level included in this kind of farm and the NTLM support will not be affected.
Advanced health checks for NTLM authentication websites
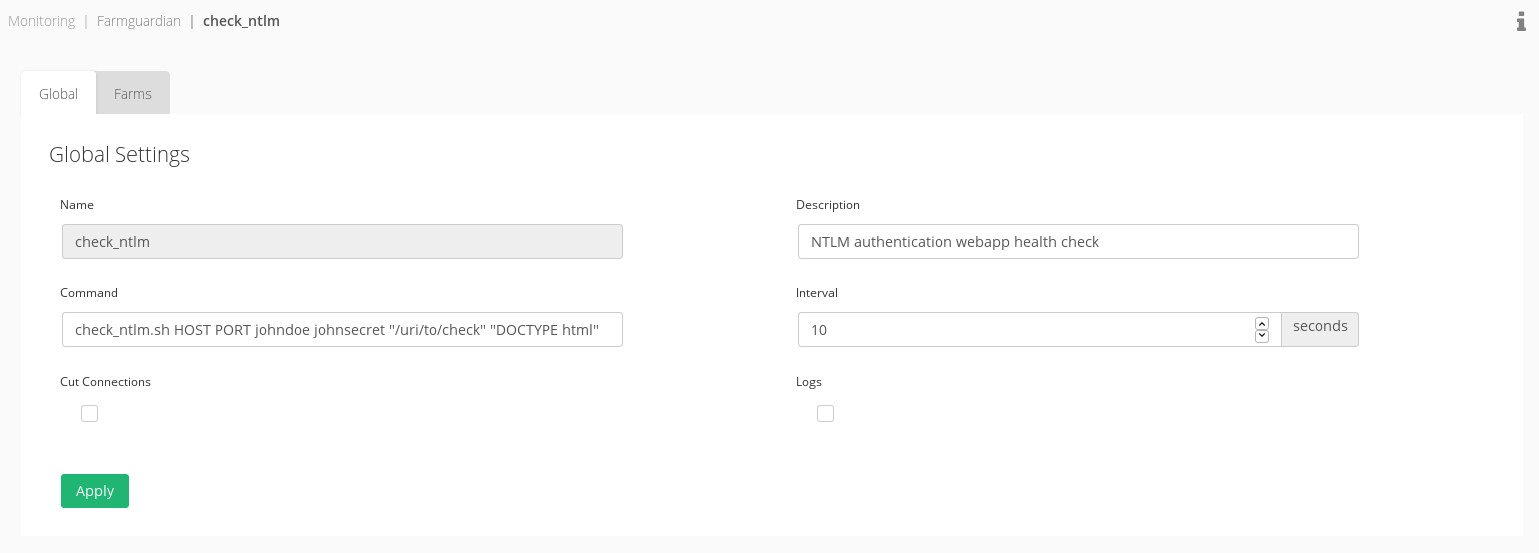
To create our custom advanced health check for NTLM authenticated applications, we’ve to create under the path /usr/local/zevenet/app/libexec a script to check the backend like it’s shown below. For example, check_ntlm.sh with the appropriate permissions.
#!/bin/bash

# get input parameters
BACKEND=$1
PORT=$2
USER=$3
PASS=$4
URI=$5
STRING=$6

/usr/bin/curl http://${BACKEND}:${PORT}${URI} --ntlm -negotiate -u ${USER}:${PASS} 2>/dev/null | grep "${STRING}" &>/dev/null

if [ $? == 0 ]
then
	# if the curl command doesn't fail then notify that the backend is up
	echo "Server ${BACKEND}:${PORT} OK"
	exit 0
fi

# if the the curl command fails then notify that the backend is down
echo "Server ${BACKEND}:${PORT} is not OK"
exit 1
In the Monitoring >> Farmguardian section, if applies, or adding it to the command to check in the farm service.
We can test the health check script by executing:
/usr/local/zevenet/app/libexec/check_ntlm.sh 192.168.0.99 80 johndoe johnsecret "/my/uri" "DOCTYPE html"
Knowing that the backend IP is 192.168.0.99 the port is 80 HTTP, johndoe is a dummy user in our domain, johnsecret is the dummy password, “/my/uri” is the URI to check and “DOCTYPE html” is the string to find in the response data when the request is successful.
We recommend to create a dummy user that is able to login in the domain but with no permissions, in order to include it in the health check of our services. That’s the reason of using the johndoe dummy user in our custom health check.
When our health check is tested from command line and ready, we can assign it to the farms configured with NTLM support.
Enjoy your load balanced NTLM web applications!