Contents
Overview
The purpose of this article is to explain how to make a CRM application, critical for a company like Odoo, highly scalable. Also, how set it up in high availability in order to be tolerant to failures, and how to reinforce the security of access to it.

What is high availability?
High availability is a quality of a system or component that assures a high level of operational performance, usually uptime, for a higher than normal period of time.
What is odoo?
Odoo (aka OpenERP) is a business open source software that integrates all business needs, including CRM, billing, accounting, website, warehouse and project management, manufacturing, inventory, and much more!
Setting up Zevenet Load Balancer
With Zevenet Load Balancer we can ensure high availability and prepare for mass scalability for Odoo services by following the steps below.
Note that, to follow these instructions it’ll be required to install an instance of Zevenet Load Balancer and several instances of Odoo applications. In addition, it’s very important that the Postgresql are replicated between them, in order to ensure consistency.
The environment we’re going to describe in this article is shown below.
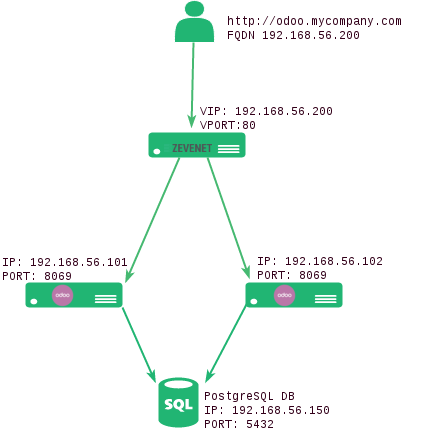
Step 1: Create a virtual IP
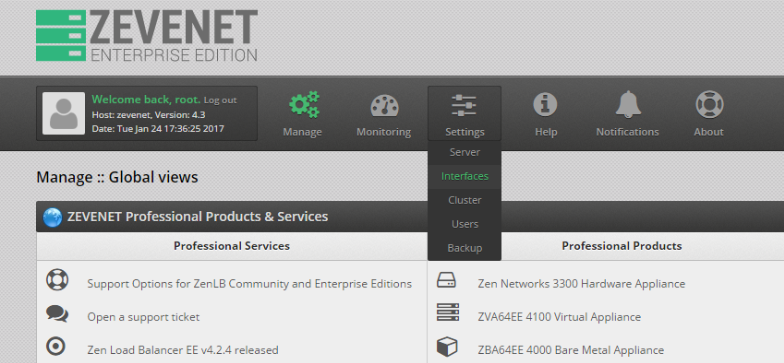
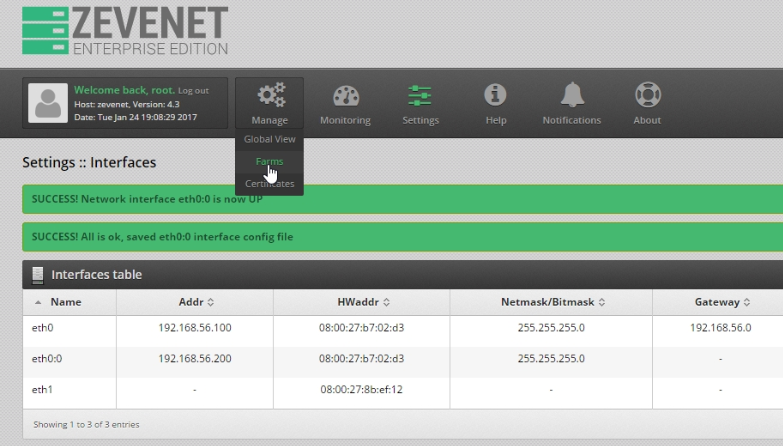
The creation of a virtual IP in the load balancer is required as it’ll be the entry point to Odoo services. In our example we will have two Odoo real servers but you can include as much as you require without any limitation. To create a new virtual IP, from the Zevenet LB main menu, select Settings->Interfaces.
Find the physical interface where you want to create a virtual IP and under Actions click on the button add virtual network interfaces.

Type the address and netmask of your new virtual IP, it must be in the same subnet as the physical device. Save it by clicking on the button save virtual interface.

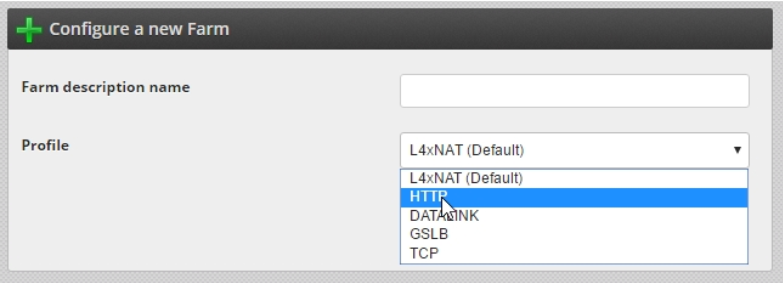
Step 2: Create http farm
A farm is a collection of computer servers that provide server functionality increasing significantly its capability. So, by setting up a farm of Odoo servers, we will increase its performance and scalability, which is essential for high availability. In order to achieve this go to Manage->Farms.
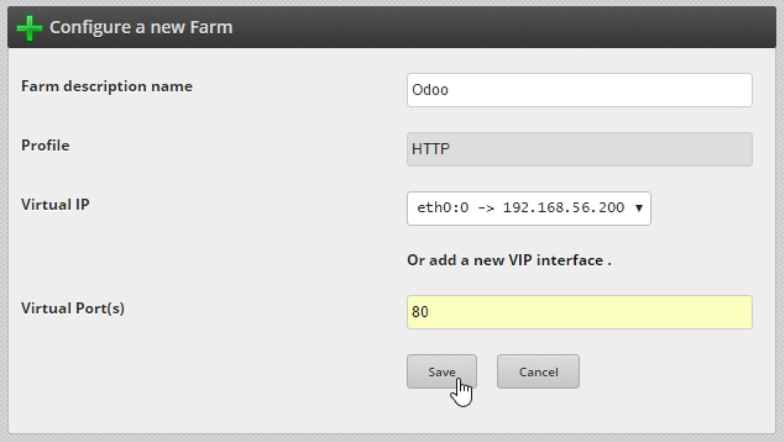
Click on Add new farm and in the new window, select a name and HTTP as profile. We select HTTP profile because it is the best option for web services and it’s required to parse application content in order to provide persistence at application level.
Two more options will be displayed. Select the virtual IP created on step 1 and a port (in the example we choose 80, as it’s the default for HTTP protocol) and click on the Save button.
For more information about farms, please refer to Manage::farms.
Step 3: Add the service
Once the farm has been created, we have to edit it in order to add a new service. Please click on the button edit farm.

Several details of the farm can be edited, now we are going to keep the default values and add a new service.
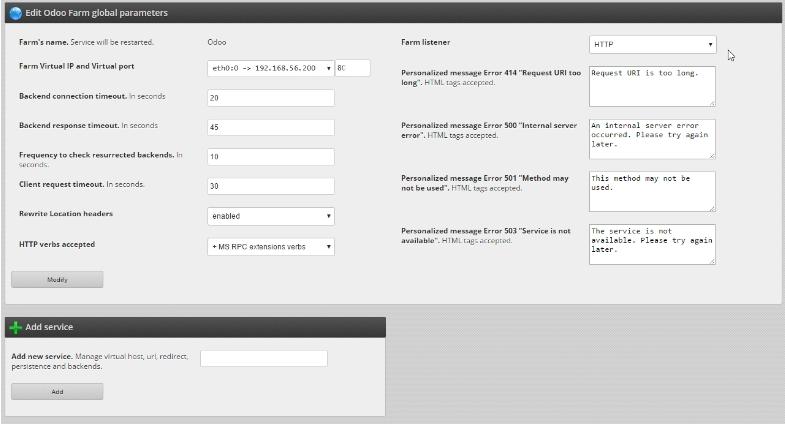
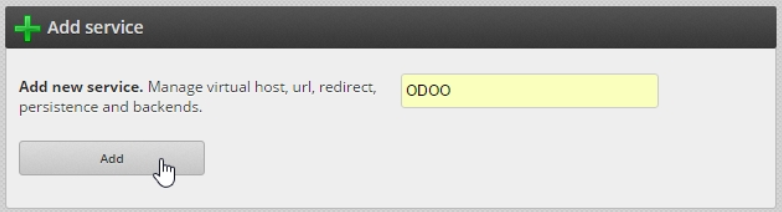
In the screenshot above, find the Add service section, type the service name and click on Add.
For now, we will leave the default values and will only add the backends where the Odoo real services will be running. Find the backends section and click on add real server button.
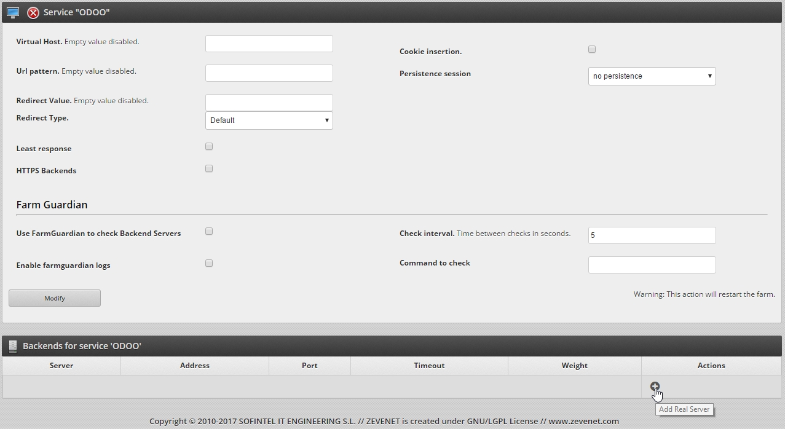
Include the IP addresses and ports of the Odoo services (default 8069 for Odoo services), timeout and weight and click on save real server.

It’s required to avoid server commutation: if during our session we jump from one server to another, there will be efficiency, data and even communication loss. In order to avoid this behavior the Persistence session option must be configured. We will choose to maintain a session by session id, so this means that during a session, we will connect to only one server.
In the service global parameters we can now change the persistence session field to COOKIE: a certain cookie and click on Modify.
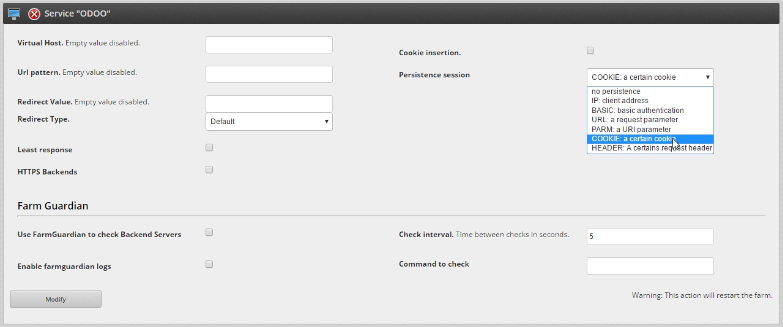
Insert session_id as persistence session identifier and click on Modify.
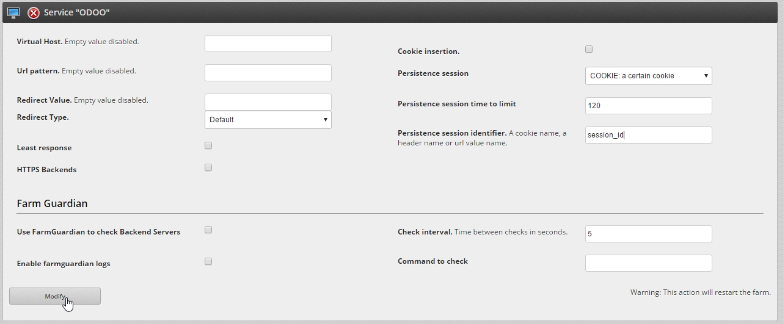
Finally, we must apply the changes by restarting the farm.
![]()
![]()
Congratulations! you have configured Odoo in high availability. You can access it by typing http://[VIRTUAL_IP]:[PORT] (in our example http://192.168.56.200).
Step 4: Advanced health check
We will now set up the farm guardian in order to perform advanced health checks to the backends ensuring that they’re up, running and the correct behavior of the application, not just a TCP port check. Please locate the Farm Guardian within the Odoo service we have set up in step 3. Click on Use FarmGuardian to check Backend Servers, you can also modify the time between check and finally, in the Command to check textbox, type the following command:
check_http -I HOST -w 10 -c 10 -t 10 -e 200 -p PORT -s '</html>'
Finally, click on Modify.

The command check_http tests HTTP connections with the specified host. In our case, we are using the following options:
-I HOST: The token HOST will be replaced by the backend IP address defined.
-w 10: response time to result in warning status: 10 seconds
-c 10: response time to critical status: 10 seconds
-t 10: 10 seconds before connection times out
-e 200: expects the string 200 in the status of the server response
-p PORT: The token PORT will be replaced by the backend port defined.
-s ‘</html>’: string to expect in content is ‘</html>’
This advanced health check ensures that we get a 200 OK response from the real servers and that the response command contains the string ‘</html>’. We select this string because it is at the end of the response, this way we can guarantee that we get a correct answer from the backends application.
Step 5: High security
Odoo does not provide a secure channel for web communication but we can easily achieve this with Zevenet Load Balancer as shown below.

We’ve to set up an HTTPS listener: On the Edit farm global parameters screen, please change the farm listener from HTTP to HTTPS and the Virtual Port to 443.

At this stage, Odoo can be accessed by typing https://[VIRTUAL_IP] in your browser.
Secure communications are now running, but we can go further by configuring the HTTPS ciphers: within the farm global parameters, locate the HTTPS Settings section. We can change the ciphers to HIGH Security.
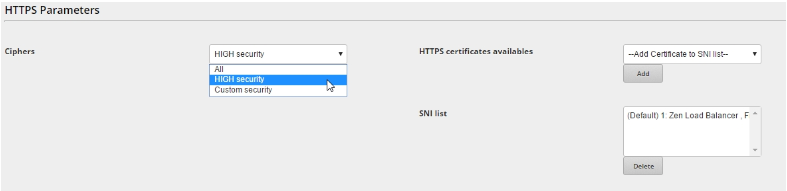
The ciphers field is used to build a list of ciphers accepted by the HTTPS server in order to harden the SSL connection. By selecting HIGH security, we will set by default the ciphers.
kEECDH+ECDSA+AES128:kEECDH+ECDSA+AES256:kEECDH+AES128:kEECDH+AES256:kEDH+AES128:kEDH+AES256:DES-CBC3-SHA:+SHA:!aNULL:!eNULL:!LOW:!kECDH:!DSS:!MD5:!EXP:!PSK:!SRP:!CAMELLIA:!SEED
Another option is the HTTPS certificates available: a list of certificates will be shown to be selected for the current farm (only for HTTP farms, which is our case). We can select one from the list and click on Add. Finally, click on Modify and restart the farm in order to apply changes.
Finally, the zencert.pem certificate could be used to test the HTTPS listener, but it’s important to use your own SSL certificate.
For further information, please refer to HTTP profile farms.
Step 6: Odoo web base
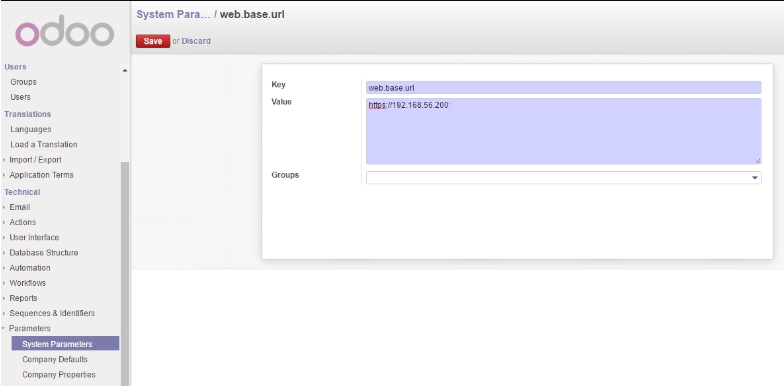
Odoo builds the URL taking into account its setting web.base.url. If we access through Zevenet Load Balancer we will see the URL switch to the backend’s URL. As we have configured secure communications through HTTPS, this might pose a problem and we could only navigate to the Odoo base URL. In order to avoid this, we must set the web.base.url parameter in each odoo server.
In order to achieve this, access each backend, and on the left panel, go to Technical >> Parameters >> System parameters and change the web.base.url to the Zevenet Load Balancer virtual IP and port selected for the odoo farm. In our example would be https://192.168.56.200, or even better, https://odoo.mycompany.com .
The technical features might be disabled. If that is the case, the Technical options won’t be available. To solve this, select Users >> Users, edit the current user and enable the Technical Features option under Usability.
Step 7: Odoo filestore
There are several options to configure the filestore in High Availability.
1. In every backend, we can mount a shared storage and configure the local path through the parameter ir_attachment.location under the section Settings >> Technical >> Parameters >> System parameters.
2. If we do not have an unit to provide high availability of the shared resource for the filestore, we can use Zevenet to create it for an NFS (Network File System) service in order to be mounted in every backend. As this service uses TCP and UDP ports, we can create a L4xNAT through all ports under a certain Virtual IP, which will be used to configure the mount automatically at boot time through the /etc/fstab file.
3. Other option is to configure SSHFS which uses the SSH secure service to use a remote shared filesystem. As SSH service uses TCP 22 port by default that can be load balanced through a L4xNAT without concern in a similar way to the NFS case.
Depending if it’s needed to create an active-active or active-passive shared filestore resource it’ll be needed a replication or synchronization of the files.
Although this topic is out of the scope of this article, it’ll be addressed in a dedicated article.
Now, your business processes and operations are ready to scale setting Odoo in High Availability with Zevenet, enjoy!